There’s nothing more satisfying than sinking your teeth into a warm, gooey sugar cookie and feeling that buttery crumble with the sweet burst of vanilla! But what if dietary restrictions, allergies, or simply a personal choice threatened to shatter that joy?
It’s easy to make sugar cookies without eggs! Simple ingredients and substitutes will help you whip up eggless sugar cookie batches that are soft, chewy, and delicious.
Let’s unlock the secrets of the eggless sugar cookie recipe, explore customisable variations, tips to make it chewy and perfect, and much more!
Why Make Sugar Cookies Without Eggs? Benefits of Eggless Cookies
Eggless sugar cookies offer a delightful alternative to the classic version, boasting a range of benefits that extend beyond simply being egg-free. Here are some key advantages.
Reduced Cholesterol: Since eggs are a source of cholesterol, removing them from the recipe can be a healthier choice for those managing cholesterol levels.
Potential for Lower Calorie Count: Depending on the substitutions used, eggless cookies can be slightly lower in calories than their egg-based counterparts.
Reduced Crumbling: By eliminating the egg binder, you can achieve a less crumbly cookie, making them ideal for dipping or enjoying on the go.
Flexibility for Dietary Needs: With the ability to easily adjust ingredients for dairy-free, gluten-free, or even keto-friendly options, eggless cookies can be enjoyed by individuals with various dietary restrictions.
Eggless Sugar Cookie Recipe
This eggless sugar cookie recipe will be your guide to crafting fluffy, melt-in-your-mouth cookies that rival their classic counterparts. You’ll only need simple ingredients and easy substitutions to make these cookies.
Ingredients
1 cup (2 sticks) unsalted butter, softened
3/4 cup granulated sugar
1/4 cup + 2 tablespoons milk
1 teaspoon vanilla extract
3 cups all-purpose flour
1 teaspoon baking soda
1/4 teaspoon salt
Instructions
Preheat the oven to 190°C (375°F) and line baking sheets with parchment paper.
In a large bowl, cream together the softened butter and sugar until light and fluffy. Beat in the milk and vanilla extract until well combined.
In a separate bowl, whisk together the flour, baking soda, and salt.
Gradually add the dry ingredients to the wet ingredients, mixing until just combined. Don’t overmix!
Roll the dough into balls, about 1-2 tablespoons each, and flatten slightly on the prepared baking sheets. Use cookie cutters for fun shapes, if desired.
Bake the cookies for 10-12 minutes or until the edges are golden brown.
Let the cookies cool on the baking sheets for a few minutes before transferring them to a wire rack to cool completely.
Once the cookies are cool, frost them with your desired designs (optional).
Frosting and Toppings for Eggless Sugar Cookies
Your egg-free sugar cookies are out of the oven, perfectly golden and begging for that finishing touch. Without eggs, these frosting and topping ideas will decorate your cookies and take them to the next level of deliciousness.
Egg-Free Frosting Recipes
Classic Vanilla Glaze: The all-time favourite, this frosting is simple yet satisfying. Combine 1 cup powdered sugar, 2-3 tablespoons milk, and 1/2 teaspoon vanilla extract until smooth and creamy. Adjust the consistency with more milk or sugar as needed. Want a colourful twist? Add a few drops of food colouring.
Chocolate: Melt 1/4 cup of butter with 1/4 cup of unsweetened cocoa powder. Remove from heat and whisk in 1 cup of powdered sugar, 2-3 tablespoons of milk, and 1/2 teaspoon of vanilla extract until smooth and glossy. Adjust the consistency and sweetness as desired.
Lemon Glaze: Combine 1 cup of powdered sugar, 1-2 tablespoons of lemon juice, and 1-2 tablespoons of milk (adjust for desired consistency) until smooth. Drizzle over cooled cookies for a refreshing twist.
Creamy Peanut Butter: Combine 1/2 cup creamy peanut butter, 1/4 cup softened butter, 1/4 cup powdered sugar, and 1 tablespoon milk until smooth and spreadable. Add a pinch of salt for extra flavour.
Royal Icing: For a fancy finish, try your hand at royal icing. This icing dries hard and can be piped into intricate designs, making your cookies look like edible works of art.
httpss://youtu.be/zFGDOlJ68Sg?si=kZa7_Tdi1BS1pcEa
Cookie Topping Suggestions
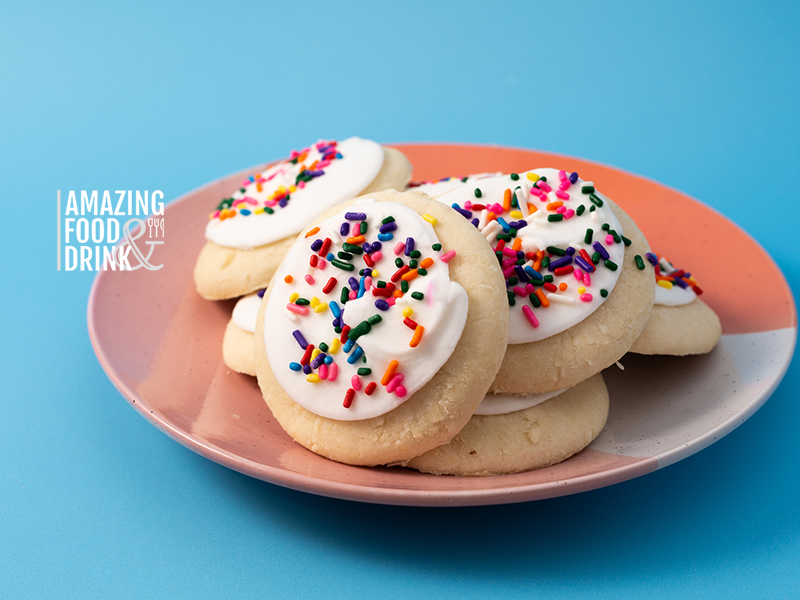
Sprinkles: Get creative with sprinkles! For classic vibes, go with rainbow sprinkles or chocolate chips. For a festive twist, try holiday-themed sprinkles or edible glitter.
Chopped Nuts: Add a satisfying crunch with chopped nuts like almonds, walnuts, or pecans. Toast them lightly for an extra depth of flavour.
Coconut: Shredded coconut adds a tropical touch and a delightful textural contrast. Sprinkle it over your cookies before baking or press it onto the sides after baking.
Salted Caramel: For a sweet and salty surprise, sprinkle the cookies with flaky sea salt before baking. Drizzle with homemade caramel sauce after cooling for an irresistible treat.
Fruit Sauce Drizzle: Top your cookies with a homemade or store-bought fruit sauce like cherry, blueberry, or apricot for a burst of sweetness and tang.
Eggless Sugar Cookie Recipe Variations
The beauty of egg-free sugar cookies lies not just in their adaptability to dietary needs but also in their incredible potential for flavour exploration. You can tweak and twist the basic recipe to create an endless array of delicious variations. Here are some ideas to get you started.
How to Make Dairy-Free Eggless Sugar Cookies
Swap dairy butter for vegan butter, vegetable shortening, or coconut oil for a creamy, dairy-free base. Choose an option with high-fat content for optimal baking results.
Opt for dairy-free milk alternatives like almond milk, coconut milk, or oat milk. Adjust the amount slightly based on the milk’s thickness.
Craft a creamy dairy-free frosting with vegan cream cheese, powdered sugar, and plant-based milk.
How to Make Gluten-Free Eggless Sugar Cookies
Replace all-purpose flour with a gluten-free flour blend specifically designed for baking. Popular options include almond flour, coconut flour, and rice flour blends.
Since gluten-free flours lack gluten’s binding properties, consider using xanthan gum or guar gum as thickeners. Start with a small amount (1/2 teaspoon) and adjust as needed.
Gluten-free cookies tend to be crumblier. Add a tablespoon of applesauce or mashed banana to the dough for a chewier texture.
How to Make Keto-Friendly Eggless Sugar Cookies
Replace all-purpose flour with nut flour for a low-carb base. Almond flour, coconut flour, and monk fruit sweetener blend are excellent keto-friendly choices.
Replace sugar with keto-friendly sweeteners like erythritol, stevia, or monk fruit sweeteners. Adjust amounts based on the chosen sweetener’s sweetness level.
Increase the fat content by adding melted coconut oil or nut butter to the dough for a richer texture and satiating effect.
Get creative with keto-friendly frosting alternatives like cream cheese frosting sweetened with stevia or a chocolate ganache made with dark chocolate and coconut cream.
Flavour Variations for Eggless Sugar Cookies
Chocolate: Add cocoa powder to the dry ingredients for a rich chocolate cookie. You can also add chocolate chips and chunks or even drizzle them with melted chocolate after baking.
Fruity: Fold in chopped dried fruit like cranberries, raisins, or apricots for sweetness and tang. You can also use fruit puree like applesauce or mashed banana for added moisture and flavour.
Spiced: Add warm spices like cinnamon, ginger, or cardamom for a cosy autumnal flavour. The pumpkin spice blend is also a great option.
Citrus Zest: Add a teaspoon of grated orange, lemon, or lime zest for a bright, refreshing twist.
Sweetener Swap: Brown sugar adds extra moisture and depth of flavour compared to white sugar. You can even experiment with honey or maple syrup for a touch of natural sweetness.
Peanut Butter: Replace half the flour with peanut butter for a rich and nutty sensation. Drizzle with melted peanut butter or sprinkle with chopped peanuts for an extra peanut punch.
Cookie Cups: Make peanut butter cookie cups by pressing a thumbprint into each dough ball before baking. Fill the centres with a dollop of chocolate or peanut butter after baking.
httpss://youtu.be/GACGsH7xcPE?si=Snju2GOjZzinI-8x
Texture Tweaks for Eggless Sugar Cookies
Chewy vs. Crispy: Adjust the baking time for different textures. Bake for a shorter time for softer, chewier cookies and a longer time for crispier ones.
Fudgey: Add a tablespoon of cocoa powder and a tablespoon of cornstarch to the dry ingredients for a fudgier texture.
Cakey: Replace half of the flour with cake flour for a lighter and airier cookie.
Nutty:Toast some chopped nuts (almonds, walnuts, pecans) and add them to the dough for a satisfying crunch. You can also experiment with nut flours like almond or hazelnut for a richer flavour.
Tips and Tricks for Perfect Eggless Sugar Cookies
Mastering the art of soft and chewy eggless sugar cookies is all about understanding the science and applying clever tricks. Here are some tips and tricks to guide you.
Chilling the cookie dough for at least 30 minutes (or up to overnight) helps solidify the fats and prevents excessive spreading, resulting in thicker, chewier cookies.
Accurate measurements are crucial. Over-measuring flour can lead to tough cookies, while too much liquid can make them spread too thin.
Don’t overmix the butter and sugar! Overmixing creates tough cookies. Cream them until light and fluffy, but stop before the mixture becomes stiff.
Use the right amount of moisture. If your dough feels too dry, add a tablespoon of milk at a time until it becomes soft and pliable.
Baking soda is your best friend for chewy cookies. Use the recommended amount, as too much can make the cookies bitter. Avoid baking powder, which tends to produce a cakier texture.
Ensure your oven is preheated to the correct temperature before baking. This helps the cookies set quickly and prevents them from spreading too much.
Bake cookies just until the edges are golden brown but the centres are still slightly soft. Overbaking will lead to dry and crumbly cookies.
Let the cookies cool completely on the baking sheet before transferring them to a wire rack. This helps the cookies set properly and prevents them from falling apart.
To maintain softness, avoid heavy toppings like nuts or chocolate chips. Opt for lighter options like sprinkles or powdered sugar.
Eggless Sugar Cookie Pairings and Serving Suggestions
Eggless sugar cookies might be the stars of the show, but the right pairings can elevate them to a whole new level of deliciousness. There are endless possibilities for pairings and serving options with egg-free sugar cookies. Here are some ideas to get you started.
Milk & Cookies: The timeless duo! Choose chilled or warm milk, depending on your mood. Try flavoured milk like chocolate, strawberry, or almond for extra flavour.
Coffee & Cookies: A perfect afternoon pick-me-up. Pair your egg-free cookies with a hot cup of coffee or cold brew for a satisfying contrast.
Ice Cream & Cookies: Create a decadent sundae! Sandwich your sugar cookies between scoops of your favourite ice cream and top with whipped cream, sprinkles, and hot fudge for a delicious treat.
Yogurt & Cookies: A healthy and satisfying snack. Top your yoghurt with crumbled cookies, fresh fruit, and granola for a nutritious and delicious treat.
Hot Chocolate & Cookies: Dunk your egg-free cookies in a mug of rich hot chocolate for a decadent and comforting treat.
Fruit Smoothies: Blend your favourite fruits and yoghurt into a smoothie, and dunk your sugar cookies for a creamy and fruity dip.
Dipping Treat: Melt some chocolate or candy melts and dip your cooled cookies for a fun and delicious treat.
How to Store and Reheat Eggless Sugar Cookies
No matter how delicious your eggless sugar cookies are, there might be times when you have some leftovers. Proper storage lets you keep those cookies fresh and ready to enjoy for days, weeks, or even months. Here’s your guide to maximising their shelf life.
Storing at Room Temperature
Freshly Baked: Airtight containers are your best friend! Store your completely cooled cookies in a tightly sealed container at room temperature for up to 3 days. Avoid storing them in direct sunlight or near heat sources.
Frosted Cookies: If your cookies have frosting, store them in a single layer in an airtight container to prevent the frosting from sticking. They’ll stay good for up to 2 days at room temperature.
Refrigerating Egg-Free Sugar Cookies
Refrigerating your cookies can extend their shelf life by up to a week. This is particularly helpful for frosted cookies or if the weather is humid.
Place your egg-free sugar cookies in an airtight container with a layer of parchment paper between them to prevent sticking. Be aware that refrigeration can alter the texture of your cookies, making them slightly firmer and less chewy. Let them come to room temperature for about 30 minutes before enjoying.
Freezing Egg-Free Sugar Cookies
Freezing is the ultimate solution for long-term storage. Individually wrap your cooled cookies in plastic wrap or parchment paper and place them in a freezer-safe bag or container. They’ll stay good for up to 3 months.
Thaw frozen cookies overnight in the refrigerator or at room temperature for a few hours before enjoying them. You can also microwave them on a low setting for a quick thaw, but keep an eye on them to avoid drying out.
Reheating Stored Egg-Free Sugar Cookies
To refresh the texture of refrigerated or frozen cookies, you can briefly reheat them. Preheat your oven to 150ºC (300°F) and bake for 5-7 minutes or until slightly warmed through. This will revive their softness and enhance the flavours.
If reheating your cookies in the microwave, use it cautiously, as it can quickly dry them out. Microwave individual cookies on low power for about 15-20 seconds, checking them frequently to avoid burning.
Final Thoughts
Feel free to experiment with different flours, frostings, and toppings to discover your signature eggless cookies. With a little creativity and our helpful tips, you’ll be baking eggless sugar cookies that are soft, chewy, and delicious.
If you need more egg-free recipe inspiration, check out many amazing resources on our website. Whip up fluffy, golden egg-free pancakes for a satisfying breakfast. Indulge in fudgy egg-free brownies that will melt in your mouth, or create crispy egg-free waffles with endless topping possibilities for a brunch that’s sure to impress. Remember, baking without eggs doesn’t mean sacrificing flavour or fun.

 eggless sugar cookie,Egg-free sugar cookie")
 eggless sugar cookie,Egg-free sugar cookie")
 eggless sugar cookie,Egg-free sugar cookie")
 eggless sugar cookie,Egg-free sugar cookie")

 Nouran Ashraf
 Salma Ihab