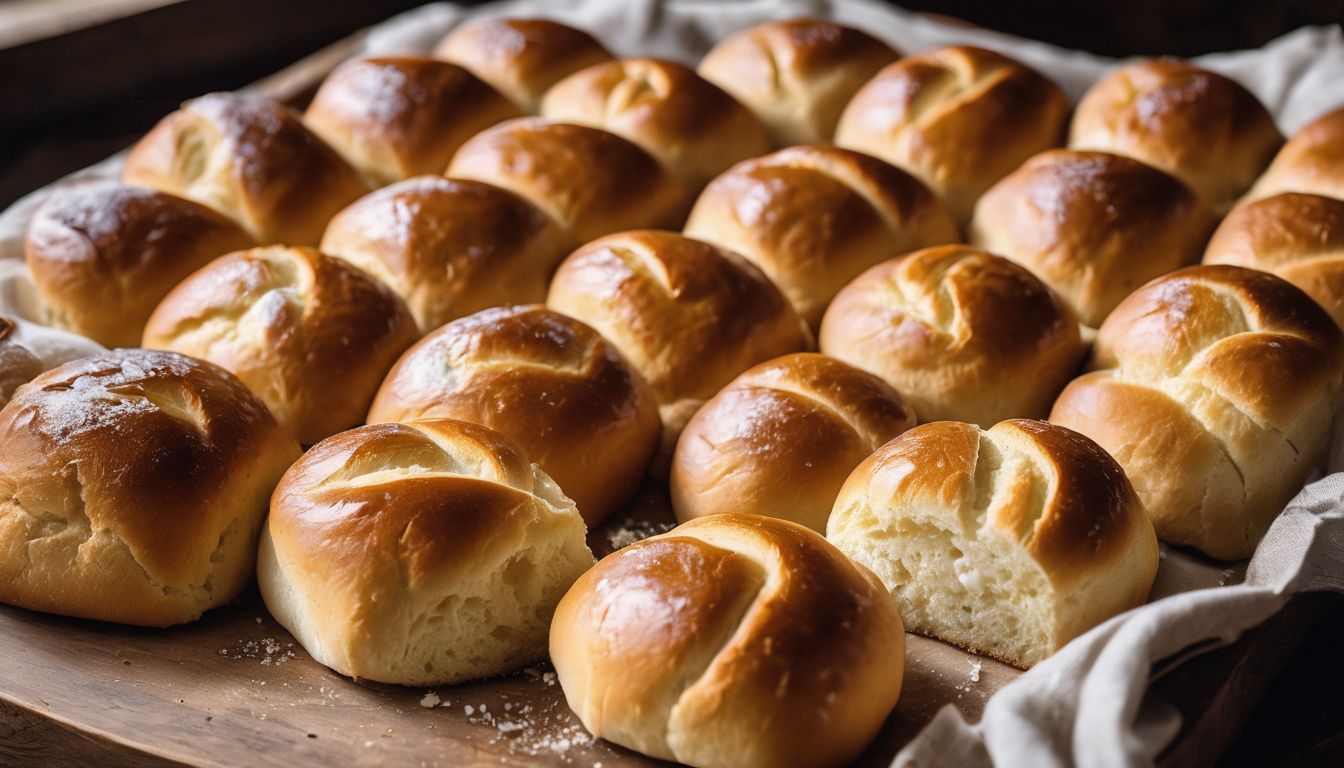
Can you resist warm, golden-brown rolls, soft as clouds and bursting with flavour, nestled next to your favourite dish? They tear apart with a satisfying sigh, releasing a comforting aroma that fills your home with pure happiness.
There is no need to sacrifice fluffy perfection or buttery goodness for allergy restrictions or dietary choices. This comprehensive guide will show you how to create delicious dairy-free dinner rolls that are as good and fluffy as their dairy counterparts.
In the following sections, you’ll find simple steps and readily available options to suit your taste and dietary needs. Discover rich flavours and textures achieved with plant-based ingredients, as well as creative twists and other recipe adaptations to make gluten-free, keto-friendly, and vegan dinner rolls.
What Are Dinner Rolls?
Dinner rolls are a popular type of bread commonly served during dinner time. These rolls are usually small, round, and soft in texture. They are typically made with yeast dough, flour, milk, egg, sugar, salt, and butter. When yeast ferments the sugars, it releases carbon dioxide that creates air pockets, resulting in that irresistible fluffy texture.
Dinner rolls come in various shapes and sizes, from classic round rolls to Cloverleaves and Parker house rolls, each offering a delightful bite. They are versatile and can be enjoyed as a side dish with a variety of meals and can also be used for making sandwiches.
Why Choose Dairy-Free Dinner Rolls?
There are various reasons why someone may opt for dairy-free dinner rolls.
One of the most common reasons is lactose intolerance or dairy allergy, which makes it impossible for them to consume dairy products.
Another reason could be following a vegan or plant-based diet, which excludes any animal products, including dairy.
Some people may simply prefer the taste of dairy-free dinner rolls or want to avoid the saturated fat and cholesterol present in dairy products.
Whatever the reason may be, it’s essential to understand that there are healthy and delicious alternatives available for those who wish to avoid dairy in their dinner rolls.
Dairy-Free Alternatives to Milk and Butter
Starting a dairy-free diet doesn’t mean you have to give up on your favourite fluffy dinner rolls. Making these rolls without milk or butter is easy, and there are many great alternatives to use instead.
Milk Alternatives
Today’s plant-based milk options are diverse, offering a range of textures, flavours, and protein content to perfectly suit your recipe. Here are some popular choices.
Soy Milk: A classic choice, boasting impressive protein content and a neutral flavour that blends seamlessly into the dough. Use unsweetened soy milk for optimal results.
Oat Milk: Its creamy texture and subtle sweetness make it a great option for enriched dough. Choose unflavoured oat milk for the best baking outcome.
Almond Milk: This light, slightly nutty milk works well in leaner doughs. Opt for unsweetened or lightly sweetened varieties.
Coconut Milk: Its richness and subtle sweetness make it perfect for denser, richer rolls. Use light coconut milk for baking to avoid an overpowering coconut flavour.
Butter Alternatives
Butter adds moisture, richness, and flakiness to dinner rolls. Here are some fantastic dairy-free substitutes.
Vegan Butter: This readily available option mimics the texture and function of regular butter almost perfectly. Choose one made with natural ingredients for optimal results.
Coconut Oil: This solid oil melts like butter and adds a subtle coconut flavour. Use refined coconut oil for a neutral taste or unrefined for a hint of coconut.
Avocado Oil: This liquid oil adds moisture and healthy fats. Substitute 3/4 cup avocado oil for 1 cup melted butter, adjusting other liquids accordingly.
Olive Oil: Another liquid option, olive oil lends moisture and a subtle grassy flavour. Use light olive oil for baking to avoid overpowering the other ingredients.
Choosing the Right Substitute
Your choice depends on the desired final product and personal preference. Vegan butter or coconut oil provides similar results to real butter, while avocado or olive oil offers lighter textures and distinct flavours. Experiment and discover what works best for you!
Dairy-Free Dinner Roll Recipe
Time to bake some soft and fluffy dairy-free dinner rolls! This recipe is designed to be easy to follow, using readily available ingredients and ensuring fluffy, flavourful results every time.
Ingredients
1 ¼ cups warm, unsweetened plant-based milk
2 ¼ teaspoons instant yeast
3 tablespoons olive oil
2 tablespoons maple syrup or brown sugar
1 ¼ teaspoons fine sea salt
1 large egg, lightly beaten
3 ½ – 4 cups bread flour, plus extra for dusting
Melted vegan butter for brushing (optional)
Instructions
httpss://youtu.be/bPqUM_lH0j4
Combine the warm milk, yeast, olive oil, maple syrup (or brown sugar), and salt in a large bowl. Let sit for 5-10 minutes until foamy and active.
Add the beaten egg and 3 ½ cups of flour to the yeast mixture. Mix with a wooden spoon or dough hook until a shaggy dough forms.
Gradually add more flour, ¼ cup at a time, until the dough becomes smooth and slightly tacky but no longer sticky.
Knead the dough for 8-10 minutes on a lightly floured surface until smooth and elastic.
Form the dough into a ball and place it in a greased bowl, seam side down. Cover with plastic wrap and let rise in a warm place for 1-2 hours or until doubled in size.
Gently punch down the dough and divide it into 12-14 equal pieces.
Shape each piece into a ball, rolling them between your palms to create a smooth surface.
Place the rolls on a greased baking sheet, leaving space between them to rise. Cover loosely with plastic wrap and let rise again for 30-45 minutes until almost doubled in size.
Preheat your oven to 190°C (375°F).
Bake the rolls for 20-25 minutes or until golden brown. Brush the tops with melted vegan butter (optional) for a richer flavour and shine.
Let the rolls cool slightly on the baking sheet before transferring them to a wire rack to cool completely. Serve warm and enjoy!
Dairy-Free Dinner Roll Recipe Variations
The beauty of this dairy-free dinner roll recipe lies in its versatility and potential to cater to different dietary needs with just a few adjustments. Below are some flavour and texture variations, followed by recipe adaptations for various dietary needs.
Dinner Rolls Flavour and Texture Twists
Herbs & Spices: Add a teaspoon of dried herbs like rosemary, thyme, or oregano to the dough for a savoury twist. For a kick, incorporate a pinch of cayenne pepper.
Seeds & Nuts: Sprinkle in 1/4 cup of sunflower seeds, chopped walnuts, or chia seeds for added crunch and flavour.
Sweet Enhancements: Replace half the brown sugar with honey or maple syrup for a sweeter dough. Add a handful of raisins or chopped dried fruit for a delightful surprise.
Garlic & Vegan Cheese: For a cheesy twist, mix in 1/4 cup vegan parmesan cheese or nutritional yeast with the flour. Add a teaspoon of garlic powder for extra savoury depth.
Whole Wheat Flour: Substitute up to half the all-purpose flour with whole wheat flour for a more rustic texture and added fibre.
How to Make Vegan Dinner Rolls
Replace the egg with a flaxseed egg (1 tablespoon ground flaxseed mixed with 3 tablespoons water and let sit for 5 minutes).
Choose any of the suggested plant-based milk options for naturally vegan dinner rolls.
Ensure all other ingredients, like the vegan butter, are free of animal products.
How to Make Gluten-Free Dinner Rolls
httpss://youtu.be/ysUiWLr2-Bw
Replace the all-purpose flour with a 1:1 gluten-free flour blend specifically designed for baking. Ensure it contains xanthan gum, which mimics gluten’s binding properties.
If you’re using oat milk, ensure it’s certified gluten-free. If not, opt for another plant-based milk option like almond milk or coconut milk.
Gluten-free rolls might have a slightly denser texture compared to their wheat-based counterparts.
How to Make Keto-Friendly Dinner Rolls
Substitute the all-purpose flour with almond flour or a keto-approved flour blend. Ensure the blend is suitable for baking and adjust the amount based on its absorbency.
Ditch the brown sugar and opt for a keto-approved sweetener like erythritol or stevia. These sweeteners might have a slightly different taste and sweetness intensity.
You can slightly increase the amount of avocado or olive oil in the dough for added moisture and richness while staying within keto macros.
Tips for Achieving Perfect Dairy-Free Dinner Rolls
Homemade dairy-free dinner rolls are easy to make but require specific steps and techniques. Below are some expert tips and tricks to ensure your dairy-free dinner rolls rise to perfection every time.
Use high-quality ingredients for optimal flavour and texture.
Lukewarm milk activates the yeast effectively. Avoid overheating, as it can kill the yeast and hinder your rise.
Take your vegan butter and eggs out of the fridge about 30 minutes before starting. This allows them to incorporate smoothly into the dough.
Aim for 8-10 minutes of kneading, either by hand or with a stand mixer. The dough should become smooth and elastic, pulling away from the sides of the bowl. This develops gluten (even in gluten-free blends) for proper structure.
Avoid over-kneading, as this can make the rolls tough. Once the dough is smooth and elastic, stop kneading.
When making significant substitutions, it’s important to adjust liquids and kneading time accordingly to achieve the desired dough consistency.
When shaping the dough balls, create slight surface tension by pulling the dough taut on the underside as you round it. This helps maintain shape during baking.
Leave enough space between the rolls on the baking sheet because they will double in size during the second rise.
Ensure your oven is fully preheated before baking to help the rolls rise quickly and achieve a golden brown crust.
Brush the tops of your rolls with melted vegan butter or olive oil before baking for a beautiful golden brown crust.
For an extra soft and fluffy interior, place a pan of hot water on the bottom rack of your oven while baking. The steam creates a humid environment that helps the rolls rise higher.
Don’t rely solely on browning to judge doneness. Use a digital thermometer to check the internal temperature of the rolls, aiming for 88°C (190°F) for doneness.
Pairings and Serving Suggestions for Dairy-Free Dinner Rolls
You can serve freshly baked dairy-free dinner rolls alongside delicious pairings that complement their fluffy texture and subtle sweetness. Let’s explore delicious pairings and serving suggestions for dairy-free dinner rolls.
Soups & Stews: Dip these soft rolls into creamy tomato soup, robust lentil stew, or a hearty chilli. The contrasting textures and warm flavours create a comforting dining experience.
Salads & Veggie Burgers: Add a touch of indulgence to your next salad by offering warm rolls on the side. They also make perfect burger buns for plant-based patties, creating a satisfying handheld meal.
Pasta & Grains: Elevate your next pasta night with a basket of warm rolls for soaking up flavourful sauces. They also pair well with quinoa bowls or rice dishes, adding a comforting element.
Roasted Vegetables & Sides: Complement roasted vegetables, mashed potatoes, or baked tofu with these rolls for a complete and delicious meal.
Bruschetta & Toasts: Slice the rolls horizontally and toast them lightly. Top with savoury bruschetta toppings like chopped tomatoes, fresh basil, and a drizzle of olive oil or balsamic glaze.
Garlic Bread Twist: Brush warm rolls with melted vegan butter infused with garlic and herbs, then bake for a few minutes until golden brown for a garlicky twist.
Stuffed Rolls: Cut the rolls in half and fill them with savoury or sweet fillings like mashed avocado, hummus, pesto, or even fruit jams for a versatile appetiser or snack.
Bread Pudding & French Toast: Leftover rolls are perfect for transforming into decadent bread pudding or French toast the next day.
How to Store and Reheat Dairy-Free Dinner Rolls
With a few tips, you can enjoy your delicious dairy-free dinner rolls fresh and fluffy for days to come. Here’s how to store and reheat your dairy-free dinner rolls properly.
Storing at Room Temperature
Let the rolls cool completely on a wire rack before storing them. Don’t store them in airtight containers while warm, as this can trap moisture and make them soggy.
Once cool, place the rolls in a clean breadbasket or loosely covered with a cloth to allow for some air circulation.
Enjoy stored dairy-free dinner rolls within 1-2 days for optimal freshness.
Refrigeration for Short-Term Storage
Ensure the rolls are completely cool before storing them in the refrigerator.
Transfer the rolls to an airtight container to prevent them from drying out or absorbing other flavours.
Store them on a shelf, not the door, which experiences temperature fluctuations.
Enjoy refrigerated dairy-free dinner rolls within 3-5 days for the best texture.
Freezing for Long-Term Storage
Let the rolls cool completely, and then flash-freeze them individually on a baking sheet for about 30 minutes. This prevents them from sticking together when frozen solid.
Once frozen solid, transfer the rolls to freezer-safe zip-top bags or airtight containers. Label them with the date for easy identification.
Enjoy frozen dairy-free dinner rolls within 3 months for optimal quality.
Reheating Options and Instructions
From Refrigerator: To revive refrigerated rolls, preheat your oven to 175°C (350°C). Place the rolls on a baking sheet and heat in the oven for 5-7 minutes or until warmed through.
From Freezer: Thaw frozen rolls in the refrigerator overnight before reheating. Follow the same oven method as above, adding a few extra minutes if needed.
Microwave Method: Wrap a single roll in a damp paper towel and microwave on high for 15-20 seconds or until warmed through. Be careful not to overheat, as this can dry out the rolls.
Conclusion
Dairy-free dinner rolls offer a chance to explore new ingredients, cater to dietary needs, and create a truly inclusive dining experience. Explore exciting variations, discover perfect pairings, and make your own creative twist.
For further inspiration, explore our website for even more dairy-free delights! Try our dairy-free cream of mushroom soup recipe to pair with your warm dinner rolls for a truly soul-satisfying meal, or discover our dairy-free crepe recipe with sweet and savoury fillings for a versatile breakfast or dessert option.


 Shaimaa Olwan