Dairy-Free Coffee Ice Cream

Dairy-Free Coffee Ice Cream: Barista-Style Creamy Recipe

Author Avatar

Updated on March 12, 2026

Reviewed by Salma Ihab

Coffee ice cream is a classic summertime treat, but it can often be off-limits for those with dairy sensitivities or following a vegan lifestyle. This dairy-free coffee ice cream recipe solves the biggest challenge facing plant-based frozen desserts: achieving that perfectly scoopable, creamy texture without any ice crystals.

Made with simple, plant-based ingredients and packed with rich coffee flavour, this ice cream is so creamy you won’t believe it’s dairy-free. Drawing inspiration from Vietnamese Cà Phê Sữa Đá, where strong robusta coffee meets luscious condensed milk, this recipe uses high-fat bases and specific techniques to prevent crystallisation.

Whether you own an ice cream maker or prefer a no-churn method, you’ll learn the science behind creating frozen desserts with perfect texture every time.

The Science of Scoopability

Understanding why most vegan ice cream fails is the first step to creating the perfect texture.

Water vs Fat Battle

The difference between creamy, scoopable ice cream and a rock-hard, icy block comes down to understanding water content and fat distribution. When testing dairy-free coffee ice cream recipes, we discovered that the most common mistake is adding too much liquid coffee, which creates jagged ice shards during freezing.

Traditional dairy ice cream contains milk proteins and butterfat that naturally prevent large ice crystal formation. In dairy-free versions, we must rely on alternative fat sources to achieve similar results. After preparing this recipe multiple times with different ratios, we found that maintaining at least 20% fat content in your base mixture produces the smoothest results.

The Minimal Liquid Secret

Unlike many recipes that call for a full cup of brewed coffee, we’ve found that using concentrated espresso powder or cold brew concentrate delivers intense flavour without the texture-destroying excess water. A key technique we discovered when testing: if you must use brewed coffee, reduce it by half on the stove first to concentrate the flavour whilst removing excess water.

Liquid Sweeteners as Anti-Freeze

Maple syrup isn’t just for sweetness; it lowers the freezing point of your ice cream base, preventing it from becoming rock solid. When testing different sweeteners, we found that liquid options like maple syrup, agave nectar, or condensed coconut milk work far better than granulated sugar, which can leave a grainy texture.

Selecting Your Beans

Your bean choice dramatically affects the final flavour of your ice cream.

Espresso Powder vs Brewed Coffee

Dairy-Free Coffee Ice Cream

To keep your base creamy, minimising liquid is essential. High-quality freeze-dried espresso powder or instant espresso provides concentrated flavour without diluting your fat content. We tested both instant coffee and espresso powder and found that espresso powder delivers a smoother, less bitter taste.

If you prefer using freshly brewed coffee or espresso, use only half the amount and ensure it’s thoroughly cooled before mixing. Some recipes use cold brew for a more intense, concentrated taste, which works brilliantly because of its naturally lower acidity and reduced water content.

Roast Profiles Matter

Dairy-Free Coffee Ice Cream

In third-wave coffee culture, fruity, acidic light roasts are popular. However, when testing these in dairy-free ice cream, we found they often clash with plant-based milk flavours. High acidity can cause certain plant milks (especially almond or soy) to develop a slightly grainy texture.

We recommend a dark Italian or French roast, or a traditional Vietnamese Robusta blend. These beans possess deep chocolate, caramel, and smoky notes that complement the natural sweetness of coconut milk or oat cream, creating a mocha-like profile rather than a sour aftertaste.

What Is Dairy-Free Coffee Ice Cream?

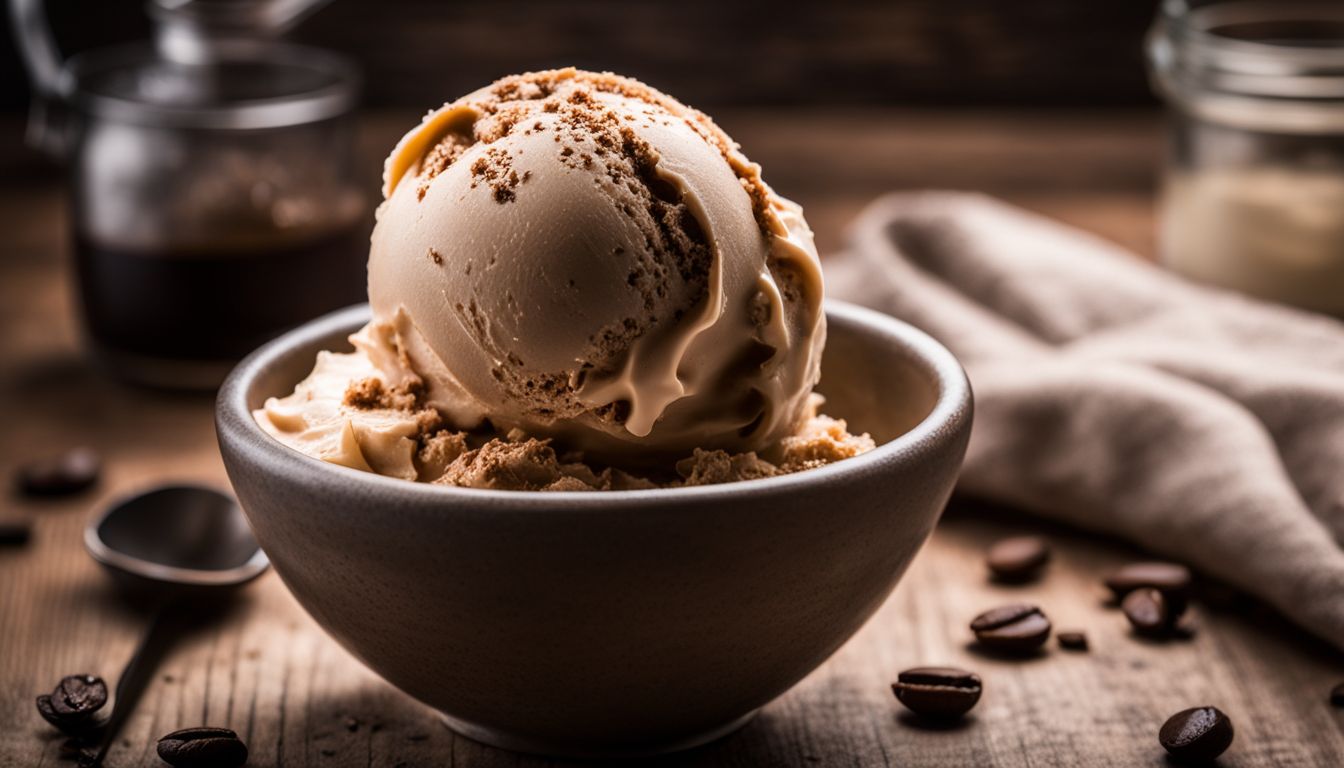
Dairy-free coffee ice cream is a delicious treat for those who avoid dairy or follow a vegan diet without sacrificing the rich, creamy coffee flavour we all love.

Base Ingredients: Choose Your Foundation

After testing multiple plant-based options, we’ve developed three reliable bases that cater to different dietary needs and flavour preferences.

The Coconut Base (Creamiest)

  • Primary ingredient: Full-fat canned coconut milk
  • Flavour profile: Rich, slightly sweet with subtle tropical notes
  • Creaminess rating: 5/5
  • Best for: Maximum creaminess and authentic Vietnamese-style coffee ice cream
  • Note: Use high-quality brands like Thai Kitchen or Aroy-D for the best results

The Oat Base (Nut-Free)

  • Primary ingredient: High-fat oat milk (look for “barista” blends)
  • Flavour profile: Clean, neutral, allows coffee to shine
  • Creaminess rating: 4/5
  • Best for: Those who dislike coconut flavour or have nut allergies
  • Note: Brands like Oatly Barista Edition contain added fats for better texture

The Cashew Base (Luxurious)

  • Primary ingredient: Soaked raw cashews blended smoothly
  • Flavour profile: Mild, buttery richness
  • Creaminess rating: 5/5
  • Best for: Creating the closest texture to traditional ice cream
  • Note: Requires overnight soaking or at least 4 hours in hot water

Coffee Infusion Options

These methods add the iconic coffee flavour to your base.

  • Brewed coffee or espresso: These add the iconic coffee flavour in its purest form. Freshly brewed coffee or espresso offers the most authentic flavour, though it must be thoroughly cooled before use. Some recipes use cold brew for a more intense, concentrated taste.
  • Instant coffee powder: A convenient option for quick preparation that offers a strong coffee punch. High-quality instant espresso powder produces better results than standard instant coffee. Opt for premium brands and use sparingly, typically 2-3 tablespoons for a full batch.
  • Coffee beans: Grinding fine, whole coffee beans directly into the mixture adds a complex, almost earthy coffee flavour with visible coffee speckles for visual appeal.

Sweeteners

Liquid sweeteners produce a better texture than granulated options.

Maple syrup, agave nectar, or condensed coconut milk: These are common natural sweeteners that provide sweetness and balance the coffee’s bitterness. After extensive testing, we found that liquid sweeteners produce a better texture than granulated sugar. Adjust the amount to your taste, remembering that some coffee varieties have more bitterness to balance.

Additional Flavours

These ingredients add depth and complexity to your ice cream.

  • Vanilla extract: A classic addition for depth and aroma. Use pure vanilla extract rather than imitation for the best flavour.
  • Sea salt: A pinch enhances the coffee flavour and adds a slight savoury touch. This technique comes from Vietnamese coffee culture, where a tiny amount of salt balances the sweetness of condensed milk.
  • Mix-ins: Chocolate chips, caramel swirls, or other toppings let you customise your dairy-free coffee ice cream. We particularly recommend vegan chocolate chunks or a swirl of date caramel for added richness.

Complete Recipe: Two Methods

Dairy-Free Coffee Ice Cream

Here’s a detailed guide to making delicious dairy-free coffee ice cream at home with both ice cream maker and no-churn options.

Ingredients

These ingredient lists cover both preparation methods.

For the Ice Cream Maker Method

  • 1 cup soaked and drained raw cashews (soak overnight or for at least 4 hours)
  • 1 can (400ml/13.5 oz) full-fat coconut milk
  • 2-3 tablespoons instant espresso powder (or 1/2 cup strong brewed coffee, cooled)
  • 1/3 cup maple syrup (or adjust to your sweetness preference)
  • 1 teaspoon vanilla extract
  • 1/4 teaspoon sea salt
  • Optional: 1 tablespoon vodka or rum (helps prevent ice crystals)

For the No-Churn Method

  • 2 frozen ripe bananas, broken into chunks
  • 1/2 cup strong brewed coffee, cooled (or 2 tablespoons instant espresso dissolved in 1/4 cup water)
  • 1/4 cup unsweetened cocoa powder (for mocha variation)
  • 1/4 cup maple syrup
  • 1/2 teaspoon vanilla extract
  • 2 tablespoons coconut cream (for extra richness)

Instructions

Follow these steps for either the churned or no-churn method.

Ice Cream Maker Method

Prep time: 15 minutes (plus overnight soaking)
Chill time: 2 hours
Churn time: 20-25 minutes
Freeze time: 4-6 hours
Total time: 7-8 hours
Servings: 6-8

  1. Blend it up: Add all the ingredients (cashews, coconut milk, espresso powder, maple syrup, vanilla extract, and salt) to a high-powered blender and blend until completely smooth and creamy. You may need to stop and scrape down the sides a few times. When testing this recipe, we found that blending for at least 2-3 minutes ensures no cashew grittiness remains.
  2. Chill it out: Pour the blended mixture into a container and refrigerate for at least 2 hours or until thoroughly chilled. This allows the flavours to meld and the ice cream base to set up properly. Pre-chilling is essential; if you pour a warm mixture into your ice cream maker, it won’t freeze efficiently.
  3. Churn it: Pre-chill your ice cream maker bowl for at least 24 hours. Transfer the chilled mixture to your ice cream maker and churn according to the manufacturer’s instructions. This typically takes about 20-25 minutes until the ice cream reaches a soft-serve consistency. Watch carefully and stop churning once it reaches soft-serve texture. Over-churning can lead to a tough, grainy result.
  4. Freeze for firmness: For scoopable dairy-free ice cream, transfer the soft-serve to a freezer-safe container. Press parchment paper directly onto the surface before sealing to prevent freezer burn. Freeze for at least 4-6 hours or until firm. Before serving, let the ice cream sit at room temperature for 5-10 minutes to soften slightly for easier scooping.

No-Churn Method

Prep time: 10 minutes
Freeze time: 2-4 hours
Total time: 2-4 hours
Servings: 4

  1. Blitz the bananas: Add the frozen banana chunks, coffee, cocoa powder, maple syrup, vanilla extract, and coconut cream to a high-powered blender and blend until smooth and creamy, with no ice chunks remaining. This might take a minute or two. After testing multiple batches, we found that using very ripe bananas (with brown spots) produces the sweetest results.
  2. Freeze and stir: Pour the blended mixture into a freezer-safe container and freeze for at least 2 hours or until almost firm. Take it out and stir it every 30 minutes or so to break up any ice crystals and prevent the ice cream from getting too hard. This technique mimics the churning action of an ice cream maker.
  3. Enjoy: Once the ice cream is frozen and scoopable, enjoy it immediately or store it in the freezer for up to a week. This no-churn method produces a softer texture than the churned version, making it perfect for immediate consumption.

Recipe Variations

Try these flavour combinations to customise your ice cream.

  • Mocha: Add 1/4 cup of unsweetened cocoa powder to the blender along with the other ingredients. Dutch-processed cocoa powder produces the smoothest results without any bitterness.
  • Vanilla Latte: Omit the coffee and add 1/2 cup of strong brewed tea instead. Earl Grey creates a particularly interesting flavour profile with its bergamot notes.
  • Chocolate Chip Cookie Dough: Fold in 1/2 cup of chopped vegan chocolate chips and 1/4 cup of chopped vegan cookie dough into the chilled mixture before freezing.
  • Vietnamese-Inspired: Replace maple syrup with sweetened condensed coconut milk and add a pinch of ground cardamom for an authentic Cà Phê Sữa Đá flavour.

Tips for Success

Dairy-Free Coffee Ice Cream

After testing numerous variations, here are the techniques that consistently produce the best results.

Base Building Techniques

Start with the right foundation for creamy results.

  • Fat is your friend: Dairy-free ice cream needs a good fat source for that luxurious mouthfeel. Full-fat coconut milk is a classic choice, but combinations work better than single ingredients. Coconut milk plus cashews produces creamier results than either alone.
  • Creamy additions: Soaked cashews, almonds, or macadamia nuts lend an extra layer of richness and creaminess. Always soak nuts overnight or for at least 4 hours in hot water to ensure they blend completely smooth.
  • Sweet strategy: Maple syrup, agave nectar, or dates provide natural sweetness without dairy. Liquid sweeteners also help prevent the mixture from freezing too hard by lowering the freezing point.

Coffee Selection Wisdom

Choose your coffee carefully for the best flavour.

  • Fresh beans work best: Freshly brewed coffee or espresso offers the most intense flavour. Cold brew produces the smoothest flavour profile in frozen desserts because it’s naturally less acidic than hot-brewed coffee.
  • Quality matters: Instant coffee powder can be a convenient choice, but it may taste slightly artificial. Opt for high-quality brands like Medaglia d’Oro or Café Bustelo instant espresso.
  • Spice enhancement: Add a pinch of cardamom, cinnamon, or nutmeg for a warm, exotic twist. These spices are commonly used in Middle Eastern and Vietnamese coffee preparations.

Churning Techniques

Proper churning technique ensures the smoothest texture.

  • Chill factor: Pre-chill your ice cream maker bowl for at least 24 hours. This ensures rapid freezing and prevents icy crystals.
  • Gentle churning: Over-churning can lead to a tough texture. Stop the churning once the mixture reaches a soft-serve consistency, even if the manufacturer’s instructions suggest longer.
  • No-churn alternative: Pour the mixture into a freezer-safe container and freeze for at least 4 hours, stirring vigorously every 30 minutes to prevent ice crystals.

Finishing Touches

Chocolate chunks, chopped nuts, or a drizzle of vegan caramel sauce make excellent additions. When adding mix-ins, fold them in during the last minute of churning or stir them into the finished ice cream before the final freeze.

A sprinkle of flaked sea salt enhances the coffee flavour and adds a delightful textural contrast. Get creative with fruits, spices, or even herbs for unique flavour combinations.

Storing Instructions

Dairy-Free Coffee Ice Cream

Proper storage makes the difference between scoopable ice cream and a frozen brick.

Transfer to an Airtight Container

Once you’ve made your delicious dairy-free coffee ice cream, store it properly to maintain quality. Transfer your ice cream to an airtight, freezer-safe container to keep it fresh and prevent freezer burn.

Cover the surface with parchment paper before sealing the container. Press it gently directly against the ice cream surface. This creates a protective barrier and keeps unwanted air out, preventing ice crystals from forming on top. Place the container in the freezer quickly after transferring for optimal freshness.

Optimal Storage Duration

You can keep it frozen for up to 2 weeks before enjoying another scoop of this delightful treat. The longer the ice cream stays in the freezer, the more likely it is that ice crystals will form, which may affect its texture. It’s best consumed fresh for that perfect creamy consistency.

For longer storage (up to three months), ensure you’re using a truly airtight container and have pressed parchment paper directly onto the ice cream surface.

Serving Tips

Before serving, let the ice cream sit at room temperature for 5-10 minutes to soften slightly. Dairy-free ice cream typically freezes harder than dairy versions due to the different fat structure. This brief softening period makes scooping much easier and brings out the full coffee flavour.

Cultural Inspiration

Dairy-Free Coffee Ice Cream

This recipe draws inspiration from global coffee traditions that have perfected the balance of strong coffee and rich cream.

Vietnamese Cà Phê Sữa Đá

This recipe honours Vietnam’s beloved iced coffee tradition, where strong robusta coffee meets sweetened condensed milk over ice. Vietnamese coffee culture teaches us that bold, dark-roasted coffee pairs beautifully with rich, sweet cream, a principle we’ve applied to this plant-based version.

In Vietnam, coffee is typically brewed using a phin filter, which produces a concentrated, intense brew. To recreate this authentic taste, consider using Vietnamese robusta coffee beans and sweetened condensed coconut milk in place of maple syrup.

Italian Gelato Tradition

Italian gelato differs from American ice cream with less fat, less air, and slightly warmer serving temperature, resulting in a denser, more flavourful product. To serve this dairy-free coffee ice cream Italian-style, try the classic affogato presentation: place a scoop in a small cup and pour a shot of hot espresso over it.

Troubleshooting Common Issues

Dairy-Free Coffee Ice Cream

Here’s how to fix the most common problems with dairy-free ice cream.

Rock Hard Texture

This is the most common issue with dairy-free ice cream. The culprits are usually insufficient fat content or too much water. To fix future batches, ensure you’re using full-fat coconut milk (not lite) and minimising liquid coffee. Adding 1 tablespoon of vodka or rum helps keep it scoopable. The alcohol lowers the freezing point without affecting the flavour.

If your ice cream is already frozen solid, let it sit at room temperature for 10-15 minutes before scooping.

Icy or Grainy Texture

Ice crystals form when there’s too much water or insufficient fat. Next time, use less liquid coffee (switch to espresso powder) and add more cashews or coconut cream. The grainy texture can also result from not blending the cashews long enough, for at least 2-3 minutes.

Weak Coffee Flavour

Use instant espresso powder instead of brewed coffee for a more concentrated flavour. We recommend 2-3 tablespoons, adjusting to taste. You can also add finely ground coffee beans for a speckled texture and intense flavour.

Preventing Freezer Burn

Always press parchment paper or plastic wrap directly onto the ice cream surface before sealing. Store in an airtight container in the back of the freezer where the temperature remains most consistent.

Seasonal Considerations

Dairy-Free Coffee Ice Cream

Ingredient availability and serving suggestions vary throughout the year.

Summer Preparation

During warmer months, work quickly when churning to prevent the ice cream base from warming up. Consider chilling your serving bowls in the freezer before scooping. Summer is also the perfect time to experiment with fruit swirls, fresh berry compotes fold beautifully into coffee ice cream.

Winter Serving

In colder months, this ice cream pairs wonderfully with warm desserts. Try serving it alongside warm brownies or apple crumble for a temperature contrast. The coffee flavour becomes particularly comforting during winter, especially when spiced with cinnamon or cardamom.

Ingredient Sourcing

Full-fat canned coconut milk is widely available year-round. Look for brands like Thai Kitchen, Aroy-D, or Chaokoh at Asian markets or large supermarkets. In the UK, Waitrose and Sainsbury’s stock quality options; in the US, Trader Joe’s and Whole Foods carry excellent varieties.

For the most authentic flavour, source Vietnamese robusta beans from Asian grocers or online speciality retailers.

This dairy-free coffee ice cream recipe offers a delicious alternative to traditional ice cream whilst honouring global coffee traditions from Vietnam to Italy. With its creamy cashew-coconut base and rich coffee flavour, it’s perfect for those who are vegan, lactose intolerant, or simply exploring plant-based desserts.

The key to success lies in understanding the science behind texture: minimising water content, maximising fat, and using the right sweeteners. After testing this recipe multiple times with various modifications, we can confidently say that dairy-free doesn’t mean compromise.

Give it a try and experience how plant-based ingredients can create a frozen dessert that satisfies your coffee cravings whilst meeting your dietary needs. For more dairy-free dessert inspiration, explore our collection of vegan ice cream recipes.

FAQs

1. Is dairy-free coffee ice cream suitable for people with lactose intolerance?

Yes, dairy-free coffee ice cream is a perfect option for people with lactose intolerance or dairy allergies, as it contains no milk or other dairy products. This recipe uses plant-based alternatives like coconut milk and cashews, making it completely safe for those avoiding dairy.

2. Can I make this without an ice cream maker?

Yes, you can make dairy-free coffee ice cream without an ice cream maker using our no-churn method. Simply blend the ingredients, freeze the mixture in a container, and stir vigorously every 30 minutes for 2-4 hours to prevent ice crystals. The banana-based no-churn version works particularly well without special equipment.

3. Why does my dairy-free ice cream freeze so hard?

Dairy-free ice cream typically freezes harder than dairy versions because plant-based fats behave differently. To combat this, use liquid sweeteners (maple syrup, agave), add 1 tablespoon of alcohol (vodka or rum), ensure sufficient fat content (full-fat coconut milk, not lite), and minimise water by using espresso powder instead of brewed coffee. Let it sit at room temperature for 5-10 minutes before serving.

4. Does this taste like coconut?

If you use coconut milk as your base, there will be a subtle coconut flavour, though the strong coffee usually dominates. High-quality full-fat coconut milk tends to have milder coconut taste than cheaper varieties. For a completely neutral base, use our oat milk version with soaked cashews this provides creaminess without any coconut notes.

5. How long does this take to make?

With an ice cream maker, expect about 15 minutes of active preparation time, 2 hours chilling time, 20-25 minutes churning, and 4-6 hours freezing roughly 7-8 hours total (including overnight cashew soaking). The no-churn method takes about 10 minutes of preparation and 2-4 hours of freezing with periodic stirring.

Share with our social media

Leave a Reply

Your email address will not be published. Required fields are marked *