The holidays are a time for family, friends, and, of course, delectable desserts! But for those with nut allergies, the festive tablescape can sometimes feel like a minefield. Fear not, allergy warriors! Nut-free holiday desserts are a safe option and a gateway to a world of pure, unadulterated deliciousness.
In this article, we’ll unveil a treasure trove of nut-free holiday dessert recipes that will satisfy every sweet tooth and dietary need. We’ve got you covered, from quick and easy treats to show-stopping centrepieces. So gather your favourite people (and allergy-friendly baking supplies) because it’s time to bake up a holiday season like no other!
Get ready to unleash your inner pastry chef and discover the magical world of nut-free holiday desserts. Let’s bake, share, and celebrate with smiles, no worries!
9 Nut-Free Holiday Desserts Recipes
Step away from the bland cookies and generic fruit cups. This year, let’s celebrate with an explosion of flavours and textures that are as safe as they are stunning.
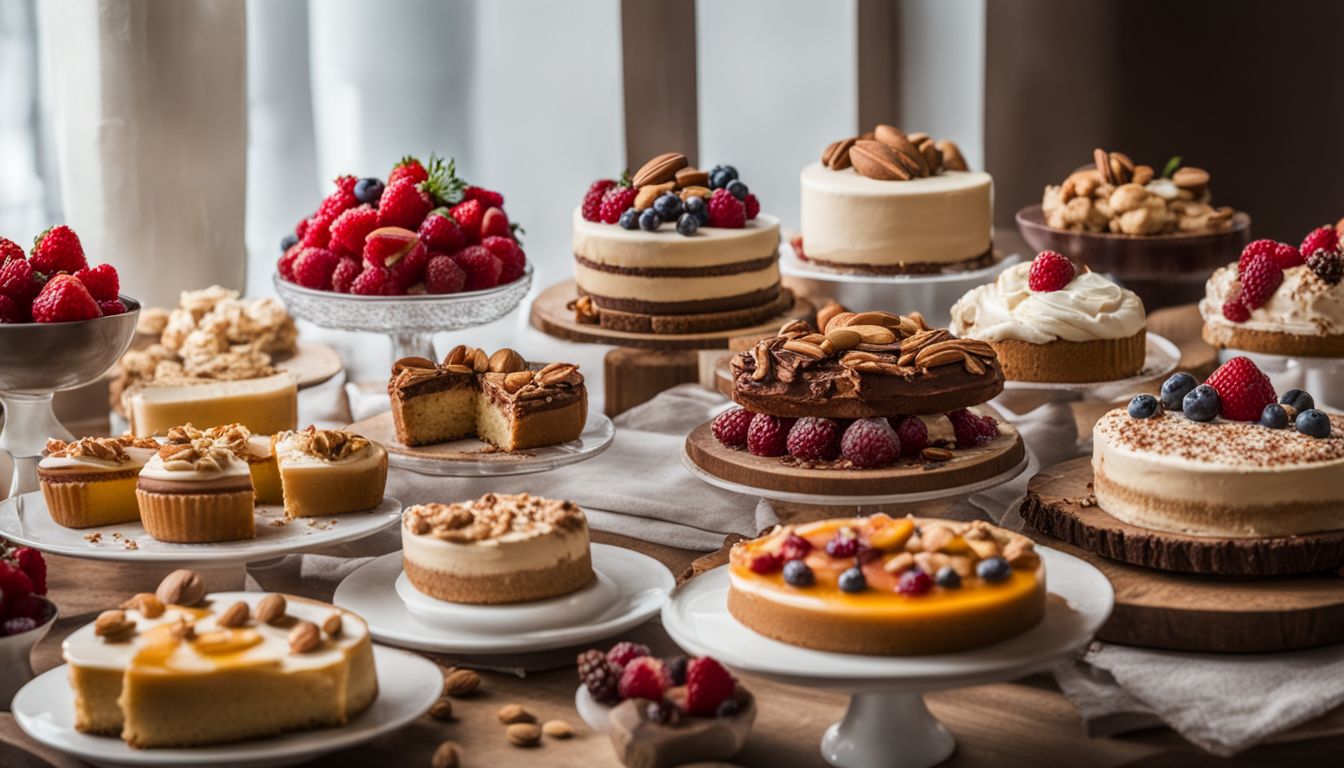
Imagine rich chocolate peppermint bark bursting with festive cheer, delicate gingerbread cupcakes crowned with eggnog cream cheese frosting, or a rustic pear and cranberry galette bursting with seasonal goodness. All without a single nut in sight!
Nut-Free Peppermint Chocolate Crinkle Cookies Recipe
Nut-Free Peppermint Chocolate Crinkle Cookies
A nut-free holiday dessert is soft and chewy cookies infused with peppermint and enrobed in rich chocolate. They’re the perfect bite-sized treat for holiday parties.
Preheat oven to 350°F (175°C)—line baking sheets with parchment paper.
Prepare the dry mix: In a medium bowl, whisk together the flour, cocoa powder, baking soda, and salt.
Cream the butter and sugar: In a separate bowl, cream together the softened butter and granulated sugar until light and fluffy. Beat in the egg, vanilla extract, and peppermint extract until well combined.
Combine wet and dry ingredients: Gradually add the dry ingredients to the wet ingredients, mixing until just combined. Do not overmix.
Chill the dough: Cover the bowl with plastic wrap and refrigerate for at least 30 minutes or until the dough is firm.
Roll the dough: Scoop out tablespoons of dough and roll them into balls. Roll the balls in the powdered sugar to coat them evenly.
Bake the cookies: Place the coated dough balls on the prepared baking sheets, leaving space between them for spreading. Bake for 10-12 minutes or until the cookies are cracked and set.
Cool and enjoy! Let the cookies cool on the baking sheets for a few minutes before transferring them to a wire rack to cool completely.
Tips
For a richer chocolate flavour, use dark chocolate cocoa powder.
You can also add 1/4 cup of chopped chocolate chips to the dough for extra decadence.
If your dough is too soft, chill it for a while before baking.
If your cookies don’t crack enough, try chilling the dough for longer or using a slightly higher oven temperature.
Nut-Free Gingerbread Cupcakes with Eggnog Cream Cheese Frosting Recipe
Nut-Free Gingerbread Cupcakes with Eggnog Cream Cheese Frosting
These festive cupcakes will surely be a hit with everyone, nut allergies or not! These nut-free holiday desserts’ are moist and flavorful cupcakes spiced with warming ginger and cinnamon and topped with a creamy eggnog frosting. They’re sure to be a hit with gingerbread lovers.
Gingerbread Cupcakes: Ingredients
1 ½ cups all-purpose flour
1 ½ teaspoons baking powder
¾ cup packed light brown sugar
¼ teaspoon salt
1 teaspoon ground ginger
1 teaspoon ground cinnamon
½ teaspoon ground cloves
¼ teaspoon ground nutmeg
6 tablespoons unsalted butter, melted and cooled slightly
2 large eggs
½ cup unsweetened almond milk
1 teaspoon vanilla extract
Instructions
Preheat oven to 350°F (175°C) and line a cupcake pan with 12 liners.
Whisk together flour, baking powder, brown sugar, salt, ginger, cinnamon, cloves, and nutmeg in a medium bowl.
Whisk together melted butter, eggs, almond milk, and vanilla extract in a separate bowl until smooth.
Gradually add the wet ingredients to the dry ingredients, mixing until just combined. Do not overmix.
Divide batter evenly among cupcake liners, filling them about ¾ full.
Bake for 18-20 minutes or until a toothpick inserted into the centre comes out clean.
Let cupcakes cool completely on a wire rack before frosting.
Eggnog Cream Cheese Frosting: Ingredients
8 ounces cream cheese, softened
4 tablespoons unsalted butter, softened
4 cups powdered sugar, sifted
2-3 tablespoons eggnog (start with 2 and add more for desired consistency)
½ teaspoon ground cinnamon
¼ teaspoon ground nutmeg
Pinch of ground cloves
Instructions
In a large bowl, cream together cream cheese and butter until light and fluffy.
Gradually add powdered sugar, beating until smooth and creamy.
Beat in eggnog, cinnamon, nutmeg, and cloves until well combined.
Adjust frosting consistency by adding more eggnog if needed.
Frost-cooled cupcakes, and enjoy!
Tips
For a richer frosting, use full-fat eggnog.
You can also add a sprinkle of crushed candy canes or mini gingerbread cookies to the tops of the frosted cupcakes for extra holiday flair.
Store frosted cupcakes in an airtight container in the refrigerator for up to 3 days.
Nut-Free Spiced Pear and Cranberry Galette Recipe
Nut-Free Spiced Pear and Cranberry Galette
This rustic galette features a flaky crust filled with sweet pears, tart cranberries, and warm spices. It’s a beautiful and elegant nut-free holiday dessert that’s perfect, and without a doubt, everyone will love it.
Make the crust: Whisk together the flour and salt in a large bowl. Cut in the butter using a pastry cutter or your fingers until the mixture resembles coarse crumbs. Gradually add the ice water, one tablespoon at a time, until the dough just comes together. Form the dough into a disk, wrap it in plastic wrap, and refrigerate for at least 30 minutes.
Prepare the filling: In a large bowl, toss together the pears, cranberries, brown sugar, cornstarch, cinnamon, ginger, nutmeg, lemon juice, and orange juice. Let sit for 15 minutes to allow the flavours to meld.
Preheat oven to 400°F (200°C). Line a baking sheet with parchment paper.
Assemble the galette: Roll out the dough to a 12-inch circle on a lightly floured surface. Transfer the dough to the prepared baking sheet.
Spoon the pear and cranberry filling onto the centre of the dough, leaving a 2-inch border around the edge. Fold the border of the dough over the filling, pleating as needed. Brush the crust with the egg wash.
Bake for 45-50 minutes or until the crust is golden brown and the filling is bubbly.
Let the galette cool slightly before cutting and serving. Dust with powdered sugar and garnish with fresh thyme sprigs, if desired.
Tips
Pre-bake the dough for 10 minutes before adding the filling for an even crispier crust.
If you don’t have fresh cranberries, you can use frozen cranberries that have been thawed.
Serve the galette warm with a scoop of vanilla ice cream or whipped cream.
Nut-Free No-Bake Chocolate Peppermint Bark Recipe
Nut-Free No-Bake Chocolate Peppermint Bark
No-bake chocolate peppermint bark is a delightful holiday treat that’s perfect for anyone with nut allergies or simply looking for a quick and easy dessert. The combination of rich chocolate, refreshing peppermint, and a satisfying crunch will surely be a hit!
Ingredients
12 ounces white chocolate, chopped
6 ounces dark chocolate, chopped
8-10 candy canes, crushed (reserve some for garnish)
Instructions
Line a baking sheet with parchment paper.
Place the white chocolate in a heat-safe bowl and melt in the microwave in 30-second intervals, stirring in between, until smooth. You can also use a double boiler instead of the microwave.
Pour the melted white chocolate onto the prepared baking sheet and spread it into an even layer using a spatula.
Sprinkle half of the crushed candy canes over the white chocolate.
Place the dark chocolate in a separate heat-safe bowl and melt in the same manner as the white chocolate.
Pour the melted dark chocolate over the white chocolate and crushed candy canes, spreading it into an even layer.
Sprinkle the remaining crushed candy canes on top of the dark chocolate.
Refrigerate the bark for at least 2 hours or until set.
Break the bark into pieces, and enjoy!
Tips
Use a larger baking sheet or double the recipe for a thicker bark.
You can substitute peppermint extract for crushed candy canes if desired.
Get creative with toppings! Try drizzling the bark with melted chocolate, sprinkles, or even chopped nuts (for those without nut allergies).
Store the bark in the refrigerator for up to a week.
Here are some additional variations you can try
Triple Chocolate Bark: Add a layer of milk chocolate between the white and dark chocolate layers.
Salted Caramel Bark: Drizzle the bark with melted caramel and sprinkle with a pinch of sea salt.
Peanut Butter Bark: Spread a layer of peanut butter on top of the white chocolate before adding the dark chocolate.
Nut-Free Eggnog Cheesecake Recipe
This creamy and decadent cheesecake is flavoured with eggnog and topped with a sprinkle of nutmeg. It’s a classic Nut-free holiday dessert that’s sure to impress.
Preheat oven to 350°F (175°C). Line a springform pan with parchment paper.
Prepare the crust: In a medium bowl, combine graham cracker crumbs, sugar, and melted butter. Mix well until the crumbs are moistened. Press the crumb mixture into the bottom and sides of the prepared springform pan. Bake for 10 minutes.
Make the filling: In a large bowl, beat cream cheese and eggnog together until smooth. In a separate bowl, whisk together cornstarch and sugar. Add the cornstarch mixture to the cream cheese mixture and beat until combined. Beat in vanilla extract and nutmeg. Add eggs one at a time, beating well after each addition.
Pour the filling into the prepared crust. Bake for 50-60 minutes or until the centre is almost set. Turn off the oven and let the cheesecake cool in the oven for 1 hour, with the door slightly ajar. Then, refrigerate for at least 4 hours or until completely set.
Make the topping: In a small saucepan, whisk together eggnog, cornstarch, sugar, and nutmeg. Bring to a boil over medium heat, stirring constantly. Reduce heat and simmer for 1 minute or until thickened. Let cool slightly, then spread over the top of the chilled cheesecake. Refrigerate for another hour.
Serve the cheesecake cold, topped with whipped cream, if desired.
Tips
For an extra-smooth filling, use a hand mixer or stand mixer to beat the cream cheese and eggnog.
You can use a regular cheesecake pan if you don’t have a springform pan. However, the cheesecake will be more difficult to remove from the pan.
You can substitute rum or brandy for the eggnog in the filling and topping.
This cheesecake is best served within 3 days.
Nut-Free Cranberry Orange Bliss Balls Recipe
These Cranberry Orange Bliss Balls are the perfect holiday treat: healthy, festive, and entirely nut-free! This recipe is vibrant, flavorful, and sure to satisfy any sweet tooth.
Ingredients
1 cup rolled oats
1/2 cup dried cranberries
1/4 cup pitted Medjool dates, soaked for 10 minutes and chopped
1/4 cup unsweetened shredded coconut
1/4 cup sunflower seed butter
1 tablespoon orange juice
1 tablespoon orange zest
1/4 teaspoon ground cinnamon
Pinch of salt
Instructions
In a food processor, pulse the oats until finely ground. Add the cranberries, dates, coconut, sunflower seed butter, orange juice, orange zest, cinnamon, and salt.
Process until everything is combined and forms a sticky dough. You may need to scrape down the sides a few times.
Taste the dough and adjust sweetness or spices as needed.
Roll the dough into small balls, about 1-1.5 tablespoons each. You should get about 12-15 balls.
Optional: You can roll the balls in additional shredded coconut or chopped cranberries for extra flavour and texture.
Refrigerate the bliss balls for at least 30 minutes or until firm.
Enjoy your delicious and festive nut-free Cranberry Orange Bliss Balls!
Tips
If your dough is too dry, add a little more orange juice or sunflower seed butter.
If your dough is too wet, add a little more ground oats.
These bliss balls can be stored in an airtight container in the refrigerator for up to a week.
You can also freeze them for up to three months. Thaw them overnight in the refrigerator before enjoying them.
Variations
For a more tropical twist, swap the cranberries for dried mango or pineapple.
Add a touch of ginger or cardamom for a deeper flavour profile.
Dip the balls in melted dark chocolate for an extra decadent treat.
For a vegan option, use a vegan sunflower seed butter or tahini.
Nut-Free White Chocolate Peppermint Pretzel Bark Recipe
This nut-free white chocolate peppermint pretzel bark will surely be a hit with everyone, regardless of nut allergies. It’s the perfect sweet and salty combination with a refreshing peppermint kick, making it an ideal holiday treat or festive party snack.
Ingredients
12 ounces white chocolate, chopped
6 ounces crushed candy canes (reserve some for garnish)
1 cup (about 5 ounces) gluten-free pretzels (choose from pretzel sticks, squares, or even bites for variety)
Optional toppings: crushed nuts (for those without nut allergies), sprinkles, mini marshmallows, dried cranberries
Instructions
Line a baking sheet with parchment paper.
Place the white chocolate in a heat-safe bowl and melt in the microwave in 30-second intervals, stirring in between, until smooth. You can also use a double boiler instead of the microwave.
Pour half the melted white chocolate onto the prepared baking sheet and spread it into an even layer using a spatula.
Sprinkle half of the crushed candy canes over the white chocolate. Gently press some pretzel pieces into the chocolate, leaving space between them for additional layers.
Drizzle the remaining melted white chocolate over the first layer, covering the pretzels and candy canes. Scatter the remaining crushed candy canes and pretzels on top.
Get creative! Sprinkle with optional toppings like crushed nuts (for non-nut allergy guests), sprinkles, mini marshmallows, or dried cranberries.
Refrigerate the bark for at least 2 hours or until set.
Break the bark into pieces and enjoy the festive crunch!
Tips
Use a larger baking sheet or double the recipe for a thicker bark.
You can substitute peppermint extract for crushed candy canes if desired.
To avoid chocolate seizing from moisture, ensure your pretzels are dry before adding them to the melted chocolate.
Get creative with different pretzel shapes and sizes for a fun texture variety.
Store the bark in the refrigerator for up to a week.
Nut-Free Poached Pears with Spiced Wine and Cranberries Recipe
Let’s create a magical and warming nut-free dessert with this recipe for poached pears with spiced wine and cranberries! It’s perfect for the holidays or any celebration, offering a symphony of flavours with its fragrant wine, tart cranberries, and tender pears.
Ingredients
For the Poaching Syrup:
1 bottle (750ml) of dry red wine (such as Pinot Noir, Merlot, or Cabernet Sauvignon)
1/2 cup water
1/2 cup granulated sugar
1 cinnamon stick
4 whole cloves
1 orange, thinly sliced
1 lemon, thinly sliced (optional)
1/2 cup fresh cranberries
For the Pears:
4 ripe but firm pears (Bosc or Bartlett work well)
1 tablespoon lemon juice
Instructions
Prepare the poaching syrup: In a large saucepan, combine the red wine, water, sugar, cinnamon stick, cloves, orange slices, and lemon slices (if using). Bring to a simmer over medium heat, stirring until the sugar dissolves.
Add the cranberries: Gently stir in the cranberries and simmer for 5 minutes, allowing the flavours to meld.
Prepare the pears: Peel the pears, leaving the stems intact for a beautiful presentation. Use a paring knife to core each pear, leaving about 1 inch of flesh at the bottom. Rub the cut surfaces with lemon juice to prevent browning.
Poach the pears: Gently add the pears to the simmering poaching syrup. Make sure the liquid covers at least two-thirds of the pears. Cover the saucepan and simmer for 20-25 minutes or until the pears are tender when pierced with a fork.
Cool and serve: Carefully remove the pears from the syrup and let them cool slightly. If desired, you can keep them warm in the covered saucepan over low heat. Serve the pears warm, drizzled with the poaching syrup and topped with additional cranberries and orange slices.
Tips
If your pears are not fully ripe, you may need to simmer them for a few minutes longer.
For a thicker poaching syrup, reduce the heat and simmer 10-15 minutes after removing the pears.
You can garnish the pears with a dollop of whipped cream or vanilla ice cream for an extra decadent touch.
Leftover poaching syrup can be used to make a delicious sangria or mulled wine.
Nut-Free Spiced Apple Cake with Caramel Sauce Recipe
Let the warm spices and sweet caramel aromas fill your kitchen with this delightful nut-free spiced apple cake! This recipe perfectly celebrates the fall season or any occasion, offering a moist and flavorful cake with a decadent caramel sauce drizzle.
1 ½ cups chopped, peeled apples (such as Granny Smith or Honeycrisp)
½ cup chopped walnuts or pecans (optional, for non-nut allergy guests)
For the Caramel Sauce:
½ cup packed light brown sugar
¼ cup unsalted butter
¼ cup heavy cream
1/8 teaspoon vanilla extract
Pinch of salt
Instructions
Preheat oven to 350°F (175°C) and grease a 9×5 inch loaf pan.
Whisk dry ingredients: In a medium bowl, whisk together flour, baking soda, salt, cinnamon, nutmeg, ginger, and cloves.
Cream wet ingredients: In a separate bowl, cream together eggs and sugar until light and fluffy. Beat in applesauce, oil, and vanilla extract.
Combine wet and dry: Gradually add the dry ingredients to the wet ingredients, mixing until just combined. Do not overmix.
Fold in apples and nuts (optional): Gently fold in the chopped apples and walnuts/pecans (if using).
Bake the cake: Pour the batter into the prepared loaf pan and bake for 55-60 minutes, or until a toothpick inserted into the centre comes out clean.
Make the caramel sauce (while the cake bakes): In a small saucepan over medium heat, melt the brown sugar and butter until smooth. Stir in the heavy cream, vanilla extract, and salt. Bring to a simmer and cook for 5 minutes, stirring constantly, until slightly thickened.
Let the cake cool slightly: Remove the cake from the oven and let it cool in the pan for 10 minutes, then transfer it to a wire rack to cool completely.
Drizzle and enjoy: Slice the cake and drizzle with the warm caramel sauce. Serve with a scoop of vanilla ice cream for an extra decadent treat!
Tips
For a richer flavour, use dark brown sugar in the cake batter.
You can also substitute chopped pears or cranberries for the apples.
If you don’t have a loaf pan, you can bake the cake in cupcakes or muffins, adjusting the baking time accordingly.
Leftover cake can be stored in an airtight container at room temperature for up to 3 days or in the refrigerator for up to 5 days.
Ho-Ho-Hold the Nuts: Festive Treats for Everyone on the List
In conclusion, nut-free desserts are a great option for those with allergies or who want to enjoy a sweet treat without nuts. With a wide variety of recipes available, from cookies to pies and everything in between, there is something for everyone to enjoy.
So go ahead and whip up some delicious nut-free desserts and satisfy your sweet tooth without worry!


 Nouran Ashraf
 Salma Ihab