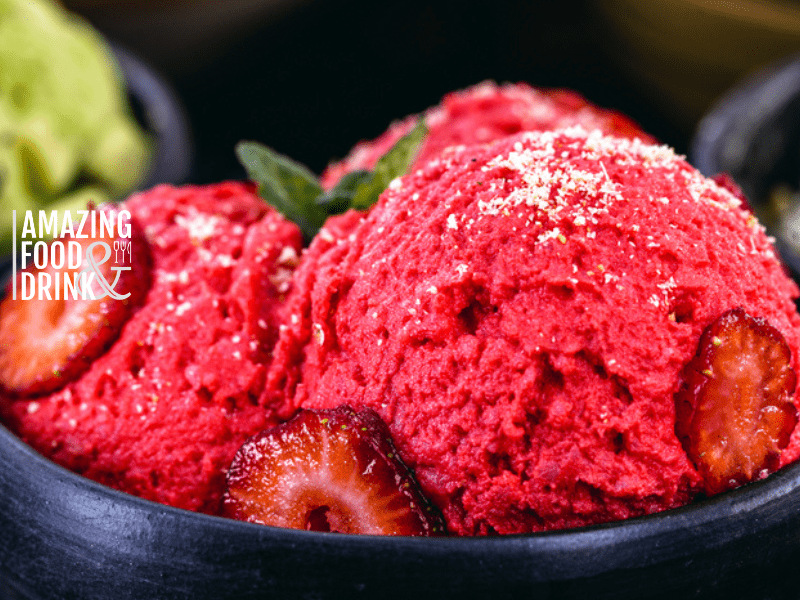
Fancy a flawless scoop of strawberry ice cream, but you remember the dairy, so you just give up? We know that feeling, so we are undertaking an arduous quest for a creamy, decadent delight without the subsequent tummy upset.
After a fair few kitchen trials and tribulations, we chanced upon an astounding combination: none other than full-fat coconut milk paired with fresh strawberries, resulting in an ultra-smooth, dairy-free ice cream! Up for satisfying your sweet cravings sans guilt? Let’s crack on, then!
Ingredients and Equipment Needed for Dairy-Free Strawberry Ice Cream
To make this delicious dairy-free strawberry ice cream, you will need fresh strawberries, canned coconut milk (full fat), sugar or alternative sweetener, vanilla extract, and either an ice cream maker or blender.
Fresh Strawberries
Fresh strawberries play a big role in this ice cream recipe. They give the ice cream a real, fruity taste that everyone loves. You can use fresh or frozen ones for these treats—the sweet, red fruit pairs well with both coconut milk and vegan options.
If you want to mix it up, try adding maple syrup or balsamic vinegar, too! So grab some ripe berries, and let’s make yummy ice cream!
Canned Coconut Milk (Full Fat)
Canned coconut milk is the core of our ice cream recipe. We need 2¼ cups of it. The full-fat type gives us a rich texture and a thick consistency that we love in creamy desserts. Make sure you get your coconut milk from a can, not a carton.
That high-fat content turns into lush creaminess in our final ice cream scoop. This comes from using full-fat canned coconut milk, not ‘lite’ versions! And one pro tip: keep your coconut milk chilled before use for the best results.
Sugar or Alternative Sweeteners
You have a choice when adding sweetness to your dairy-free strawberry ice cream. You can use sugar or an alternative sweetener. It’s all up to you and how sweet and healthy you want your ice cream.
There are many sugar substitutes out there if you don’t want to use plain sugar. One popular option is honey, which gives a subtle floral taste that suits strawberries well. Another one is coconut sugar, which has a nice caramel-like flavour.
Some people prefer artificial sweeteners or low-calorie options, especially those who watch their calorie intake closely. Keep in mind, though, that most store-bought low-sugar ice creams often add other things for texture since sugar also helps with making the ice cream smooth and creamy.
Vanilla Extract
Vanilla extract is a key part of our dairy-free strawberry ice cream recipe. It adds a hint of vanilla flavour and makes the ice cream creamy. We use just one tablespoon to two teaspoons in our mix.
Some may say it’s optional, but we think it takes the ice cream up a notch! All you need is simple equipment and this easy ingredient for homemade, tasty, dairy-free ice cream.
Ice cream Maker or Blender
For this tasty treat, you need an ice cream maker or a blender. Both can do the job well. If you have an ice cream maker at home, use it to churn your mix until creamy. Don’t worry if you don’t own one! A good blender can come in handy, too.
Just blend the mix until smooth and freeze it after that. You will get lovely dairy-free ice cream either way.
httpss://www.youtube.com/watch?v=7GB8qf6fTCs
Dairy-Free Strawberry Ice Cream
Steps to Make Dairy-Free Strawberry Ice Cream
Blend the strawberries until they are smooth, then combine the strawberry puree with chilled coconut milk, sugar or alternative sweetener, and a splash of vanilla extract.
1. Blend strawberries until smooth
Start by washing your fresh strawberries. Dry them well and remove the green tops. Then, put all your strawberries in a blender or food processor. Push the on button and let it do its work! In about two minutes, you will see a lovely puree of bright red strawberry goodness.
The sound will change, too—it becomes quiet when all the chunks are gone. This smooth texture is just right for our dairy-free ice cream recipe.
Make sure all bits of fruit are smashed into tiny parts until there are no lumps left. We want every spoonful to be creamy, with not one single hard piece in sight! Even if you’re using frozen fruits, this step works great, too! With this blend of sweet-tart berries, we’re off to an amazing start in making our non-dairy strawberry ice cream.
2. Combine strawberry puree with coconut milk, sugar, and vanilla extract
Next, let’s make the ice cream base. Blend your hulled strawberries until they are smooth. This will give us a sweet and natural strawberry-flavoured puree that forms the heart of our homemade ice cream.
Now, pour this fresh strawberry puree into a large bowl. Open up your can of full-fat coconut milk and add it to your bowl too. Coconut milk makes our ice cream creamy and rich, plus it’s plant-based, making it suitable for vegans! Add in some sugar or any other sweetener you like to bring out these refreshing flavours even more! Lastly, put in a bit of vanilla extract, giving an extra depth of flavour to our dairy-free delight! Stir all these ingredients together well before moving on to the next step.
3. Churn the mixture in an ice cream maker or blend until creamy
To make dairy-free strawberry ice cream, one crucial step is to churn the mixture in an ice cream maker or blend it until it becomes creamy. This process helps achieve a smooth and velvety texture in the ice cream.
By churning or blending, we incorporate air into the mixture, resulting in a light and fluffy final product. It also ensures that all the flavours and ingredients are evenly distributed throughout the ice cream for a deliciously balanced taste.
So whether you have an ice cream maker or a blender, this step is essential for creating the perfect dairy-free strawberry ice cream.
4. Transfer to a container and freeze until firm
Once you’ve finished making the delicious dairy-free strawberry ice cream mixture, the next step is to transfer it to a container. Make sure you choose a container that is safe to put in the freezer.
You can use one with a lid or cover it tightly with parchment paper. Once transferred, pop the container into the freezer and let it freeze until it becomes firm. It’s best to leave it in there for around 4-6 hours so that your homemade ice cream reaches its desired texture.
So sit back and relax while your creamy dairy-free strawberry ice cream transforms into a frozen treat ready to be enjoyed!
Tips for Perfect Dairy-Free Strawberry Ice Cream
To make the perfect dairy-free strawberry ice cream, make sure to use ripe and flavourful strawberries. Chill the coconut milk before using it for a creamy texture. Adjust sweetness to your taste preferences, and don’t forget to let the ice cream soften slightly before serving for optimal texture.
Find out more tips to create a delicious frozen treat!
1. Use ripe and flavourful strawberries
For the best dairy-free strawberry ice cream, it’s important to use ripe and flavorful strawberries. This will give your ice cream a burst of natural sweetness and a strong strawberry flavour.
Fresh fruit is always preferable, but you can also use frozen strawberries if that’s what you have on hand. Just make sure they’re still tasty and not overly mushy. By using the best quality berries, you’ll be able to enjoy a delicious homemade treat that everyone will love.
2. Ensure the coconut milk is well-chilled before using
To make the creamiest dairy-free strawberry ice cream, it’s important to ensure that the coconut milk is well-chilled before using it. This means putting the cans of coconut milk in the refrigerator for a few hours or overnight before you start making your ice cream.
By chilling the coconut milk, you’ll be able to scoop off and use mostly just the creamy part of the milk, which will help give your ice cream that rich and smooth texture. So remember, refrigerate those cans of coconut milk first for the best results!
3. Adjust sweetness to taste
When making dairy-free strawberry ice cream, one of the great things is that you can adjust the sweetness to your personal preference. This recipe allows for customisation, so you have control over how sweet or not-so-sweet you want your ice cream to be.
You can use sugar or alternative sweeteners like honey or another sugar substitute. If you prefer a sweeter taste, just add more sweetener, and if you prefer it less sweet, simply use less.
The choice is yours! So go ahead and tailor the sweetness level to suit your own taste buds and enjoy a perfectly personalised bowl of dairy-free strawberry ice cream.
4. Allow the ice cream to soften slightly before serving for optimal texture
To enjoy the perfect texture of your dairy-free strawberry ice cream, it’s best to let it soften a little before serving. This will help the flavours meld together and make the ice cream easier to scoop.
If your ice cream has been in the freezer for a while, it may be quite firm, so letting it sit at room temperature for a few minutes will allow it to soften up nicely. By doing this, you’ll be able to fully savour every creamy and delicious bite of your homemade treat.
Possible Variations for Dairy-Free Strawberry Ice Cream
Get creative with your dairy-free strawberry ice cream by adding mix-ins like chocolate chips or chopped nuts for added texture and flavour. You can also experiment with using different fruits in place of strawberries, such as raspberries or peaches, to create unique and delicious variations.
Don’t be afraid to try out different sweeteners or flavour extracts to customise your ice cream to your liking. The possibilities are endless when it comes to making this refreshing frozen treat!
Add mix-ins like chocolate chips or chopped nuts
We love adding extra yummy ingredients to our dairy-free strawberry ice cream! One of our favourite mix-ins is chocolate chips because they give the ice cream a rich, indulgent flavour.
You can also try adding chopped nuts like walnuts or pistachios for a delicious crunch. Other options include toasted walnuts, slivered almonds, or even chopped macadamia nuts. The possibilities are endless when it comes to customising your dairy-free strawberry ice cream with these tasty additions!
Use other fruits in place of strawberries for different flavours
We love experimenting with flavours in our dairy-free ice cream recipes, and using alternative fruits is a great way to switch things up. Instead of strawberries, you can try using fruits like peaches, mangoes, or bananas for a different taste experience.
So, go ahead and explore the world of different fruit flavours in your homemade vegan ice cream creations!
Experiment with different sweeteners or flavour extracts
Experimenting with different sweeteners and flavour extracts when making dairy-free strawberry ice cream is a great way to create unique flavours and customise the taste to your liking.
You can try using alternative sweeteners like xylitol or erythritol instead of traditional sugar for a healthier option. If you want to add an extra burst of flavour, consider using different extracts like almond or mint.
The world is your oyster, and it’s a fun way to make your dairy-free strawberry ice cream truly special!
httpss://www.youtube.com/watch?v=e1Gl72ZGHcM
Dairy-Free Strawberry Ice Cream
Conclusion and Enjoying Dairy-Free Strawberry Ice Cream
Now you have the recipe to make delicious dairy-free strawberry ice cream at home. It’s a creamy and refreshing treat that everyone can enjoy, even if they’re lactose intolerant or following a vegan diet.
So grab your ingredients, follow the simple steps, and indulge in this tasty frozen dessert. Your taste buds will thank you!
FAQs
1. Can I make dairy-free ice cream with strawberries?
Yes, you can make dairy-free ice cream using strawberries as a delicious alternative to traditional dairy-based ice cream.
2. What ingredients do I need to make strawberry dairy-free ice cream?
To make strawberry dairy-free ice cream, you will need fresh or frozen strawberries, non-dairy milk such as almond milk or coconut milk, a sweetener like maple syrup or agave syrup, and optionally some vanilla extract for flavour.
3. How long does it take to make homemade strawberry dairy-free ice cream?
The total time required to make homemade strawberry dairy-free ice cream is approximately 15-20 minutes for preparation and blending. An additional freezing time of at least 4 hours is needed for the mixture to freeze and become creamy fully.
4. Do I need an ice cream maker to prepare this recipe?
No, you don’t need an ice cream maker to prepare strawberry dairy-free ice cream. Simply blend the ingredients together and freeze the mixture in a container until it reaches the desired consistency.
5. Is homemade strawberry dairy-free ice cream healthy?
Homemade strawberry dairy-free ice creams are generally healthier than store-bought options as you have control over the ingredients used. By using non-dairy milk and natural sweeteners, it can be a nutritious treat that suits various dietary preferences or restrictions.


 Salma Ihab
 Shaimaa Olwan