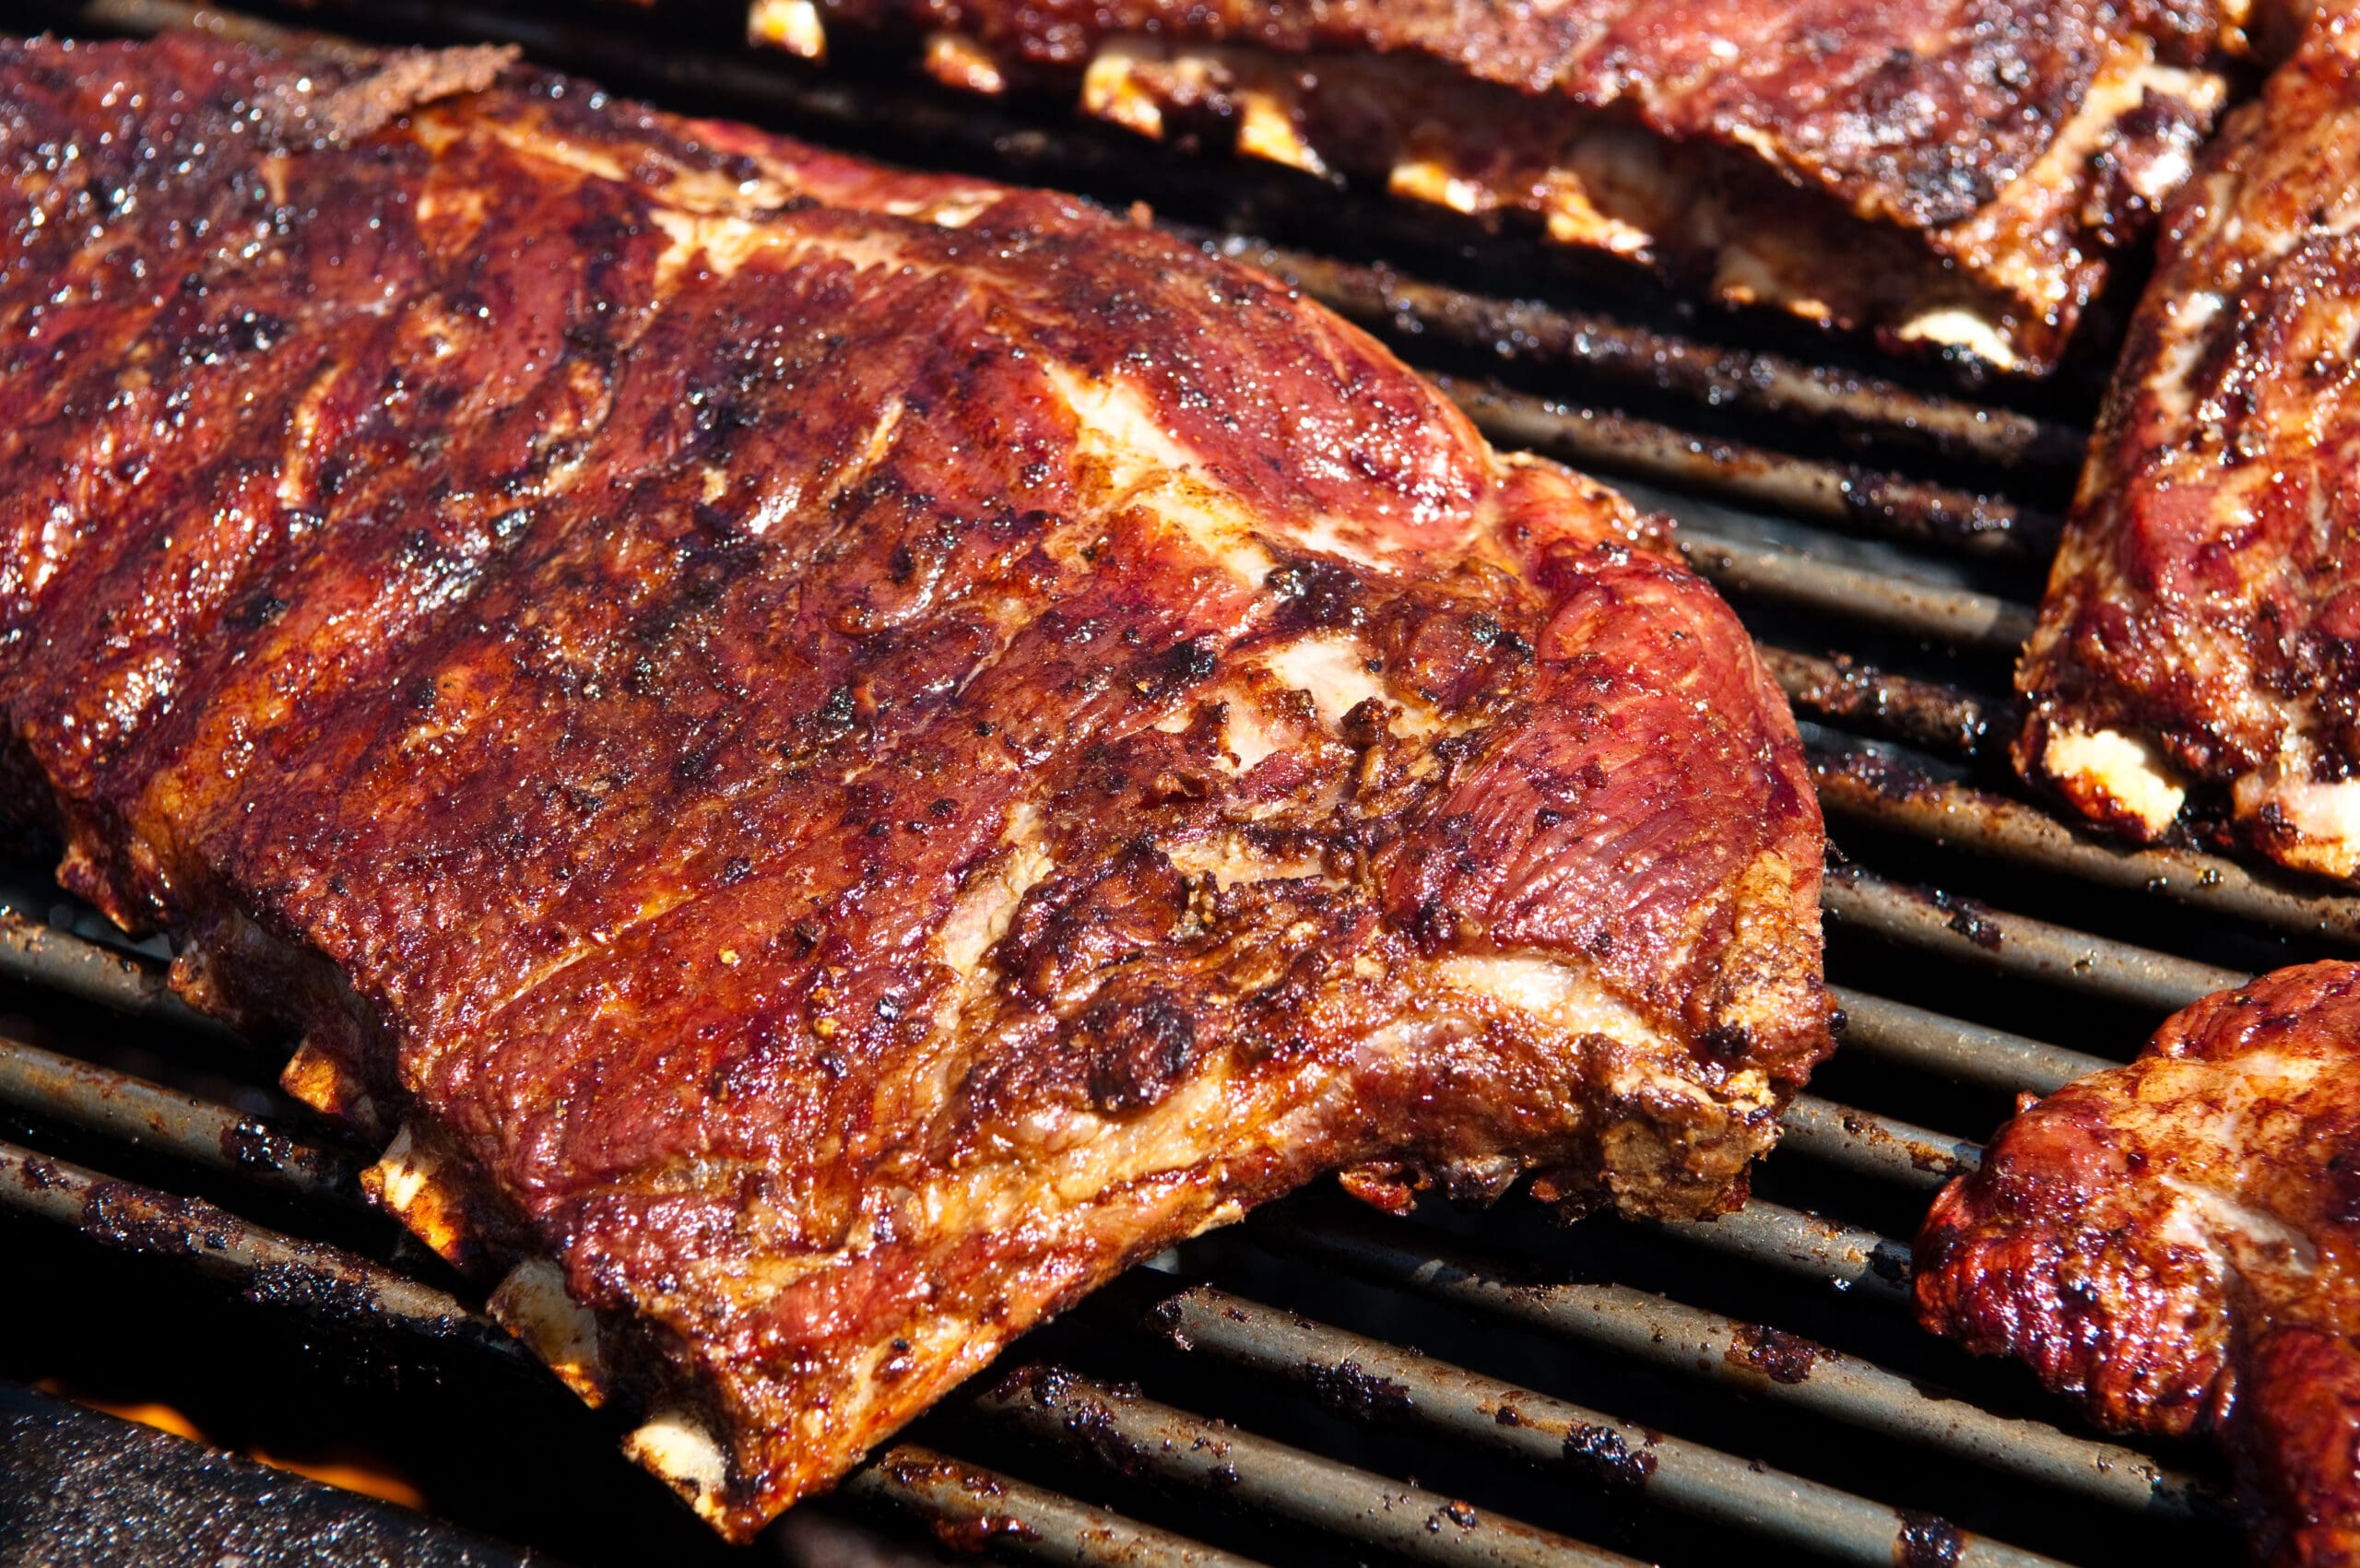
To broil country-style ribs, those meaty morsels bursting with potential is a promise of a symphony of textures and tastes. But achieving that nirvana, that perfect balance of tender, juicy meat and a crispy, caramelised exterior, can be tricky. Fear not, rib-lover, for broiling is here to answer your prayers!
The caramelised glaze, a symphony of sweet, smoky, and tangy notes, dances on your tongue. And the best part? You can achieve this culinary masterpiece right in your own oven!
httpss://www.youtube.com/watch?v=u-o8WndUjM8
How to Broil Country-Style Ribs in the Oven
Broiling country-style ribs in the oven is a great way to achieve tender, juicy country-style ribs with a crispy caramelised exterior. Here’s how to do it:
Ingredients
2-3 pounds of country-style pork ribs
Your favourite BBQ sauce
Salt and pepper to taste
Optional: Onion powder, garlic powder, paprika
Instructions
Preheat your oven to broil (usually around 500°F).
Safety tip: Line a baking sheet with foil for easy cleanup.
Pat the ribs dry with paper towels—season generously with salt, pepper, and any other desired spices.
Place the ribs on the prepared baking sheet, leaving some space between them for even broiling.
Broil the ribs for 5-7 minutes per side or until golden brown and slightly crisp. Keep an eye on them, as broilers can vary in intensity, and you don’t want to burn the ribs.
Optional: Baste the ribs with your favourite BBQ sauce during the last few minutes of broiling for an extra layer of flavour and moisture.
Once cooked through, transfer the ribs to a serving platter and enjoy!
Tips
Pre-cook extra tender ribs in the oven at 300°F for 1-2 hours before broiling. This is a good option if you’re short on time or prefer ribs that fall off the bone.
If your broiler doesn’t get very hot, you can finish the ribs off under the oven’s broiler setting for a few minutes after pre-cooking.
Get creative with your BBQ sauce! You can use store-bought or make your own. Experiment with different flavours to find your perfect rib recipe.
Broiling Country-Style Ribs: Dive into Rib Nirvana
Country-style ribs are tender, fall-off-the-bone ribs, and each bite is a juicy explosion. The caramelised glaze dances on your tongue, a symphony of sweet, smoky, and tangy notes. And the best part? You can achieve this culinary masterpiece right in your own oven!
Broiling unlocks a treasure trove of possibilities for your country-style ribs. It’s like a culinary superpower, letting you:
Embrace the Maillard magic: Broiling’s direct heat sears the ribs’ surface, triggering the magical Maillard reaction. This translates to deep, rich flavours and an oh-so-irresistible crust—the kind that begs to be devoured.
Kiss dryness goodbye: Say goodbye to dry, rubbery ribs. Broiling’s quick, intense heat seals in the juices, ensuring each bite is a juicy revelation.
Flavour infusion express: Basting with BBQ sauce during broiling infuses the ribs with smoky, sweet, and tangy goodness, infusing every crevice with pure rib-tastic joy.
And let’s not forget the convenience factor. Broiling is a hands-off hero, requiring minimal babysitting compared to other methods. Just pop those ribs in, set the timer, and voila! Culinary nirvana awaits. So, are you ready to embark on this broiling adventure? Buckle up because we’re about to delve into the nitty-gritty of achieving rib perfection.
Rib Selection: Unveiling the Perfect Canvas
In the realm of country-style ribs, there exists a harmonious symphony of textures and flavours, each bite an ode to porky perfection. But before we dive into the art of broiling, let’s embark on a quest to select the perfect rib, the ideal canvas for our culinary masterpiece.
Bone-In vs. Boneless: A Tale of Two Ribs
Bone-in ribs, the classic choice, offer a rustic charm and an undeniable finger-licking experience. The bone adds depth of flavour, acting as a natural conduit for heat and moisture, resulting in succulent, juicy meat. However, bone-in ribs require a bit more patience, as the bones tend to slow down the cooking process.
On the other hand, boneless ribs offer convenience and versatility. They cook more quickly, making them ideal for weeknight dinners or impromptu gatherings. Additionally, boneless ribs lend themselves well to various cooking methods, from braising to grilling, and are equally receptive to our broiling technique.
Choosing Your Rib Cut
Whether you’re drawn to the rustic appeal of bone-in ribs or the convenience of boneless, there are several cuts to consider:
Back Ribs: The most common cut, back ribs offer a balance of meat and fat, resulting in flavourful, tender bites.
Spare Ribs: Richer in fat, spare ribs deliver an intense flavour and a melt-in-your-mouth texture.
Country-Style Ribs: These meaty chunks come from the shoulder area, offering a delightful combination of meat and fat, perfect for braising or slow-cooking.
Sizing Up Your Ribs
Rib size is crucial for ensuring even cooking and optimal flavour. For bone-in ribs, aim for ribs that are 1-1.25 inches thick. For boneless ribs, choose cuts that are approximately 1 inch thick.
The Freshness Factor
Freshness is paramount when it comes to achieving rib perfection. Opt for ribs that are bright red or pink in colour, with no signs of discolouration or off-odours. The meat should feel firm but not stiff.
With your ideal ribs selected, we’re ready to embark on the next stage of our country-style ribs broiling adventure: seasoning. Join me as we explore the art of flavour enhancement, transforming our ribs into culinary masterpieces.
Seasoning Symphony: Transforming Ribs into Flavour
Ah, the power of seasoning! It’s the culinary paintbrush, the flavour architect, the secret weapon that elevates mere ribs into rib nirvana. In our broiling odyssey, seasoning isn’t just an afterthought; it’s the foundation upon which our masterpiece is built.
Barbecue Ribs on the Grill
Spice Symphony
Forget the boring salt-and-pepper routine. We’re going to create a symphony of spices, each note playing its part in the grand orchestra of flavour. Here’s our spice rack orchestra:
Smoked Paprika: It is the star of the show; it infuses the ribs with a smoky, earthy depth reminiscent of a campfire barbecue.
Garlic Powder & Onion Powder: The dynamic duo adds savoury warmth and a hint of sweetness, rounding out the flavour profile.
Black Pepper & Cayenne Pepper: The rhythm section provides a touch of heat and complexity, keeping your taste buds on their toes.
Dried Thyme and oregano: The herbal chorus adds subtle floral and woodsy notes, hinting at the outdoorsy spirit of ribs.
Rub-a-Dub-Dub
There are two main ways to apply this symphony of spices:
The Dry Rub: Combine all the spices in a bowl and generously coat the ribs, ensuring every nook and cranny is kissed with flavour. Let the rub sit for at least 30 minutes or even overnight for maximum infusion.
The Marinade: For an extra layer of juicy tenderness, whisk together the spices with olive oil, vinegar, and a touch of brown sugar. Submerge the ribs in this flavourful bath for at least an hour, letting the magic work its way into the meat.
Sweet and Tangy Glaze
Don’t forget the grand finale – the sweet and tangy glaze that will paint your ribs with a sticky, irresistible sheen. Here are some options:
Classic BBQ Sauce: The crowd-pleaser, with its perfect balance of sweet, smoky, and tangy notes. Choose your favourite brand or experiment with homemade concoctions.
Honey-Mustard Glaze: For a touch of sophistication, combine honey, Dijon mustard, soy sauce, and a pinch of cayenne pepper. This glaze is a sweet-and-spicy revelation.
Spicy Brown Sugar Glaze: Brown sugar, melted butter, apple cider vinegar, and some red pepper flakes create a glaze that’s sweet and tangy and packs a subtle heat.
Remember:
Season generously, but don’t go overboard. You want the spices to enhance the ribs’ natural flavour, not overpowering it.
Experiment! You can mix and match spices, create your own signature rub, and discover your perfect flavour profile.
Let the seasoning work its magic. Give the rub or marinade enough time to get through the meat and add the needed flavour.
With our symphony of spices and a touch of sweet-and-tangy glaze, we’ve transformed our humble ribs into flavour gods. Now, it’s time for the grand finale: broiling them to crispy, juicy perfection!
Join us on the next leg of our adventure, where we’ll unleash the power of the broiler and create ribs so good they’ll have you singing hallelujahs (and maybe wiping some sauce off your chin).
Broiling Bliss: Unleashing the Rib-tastic Symphony
Ah, broiling! The fiery maestro who conducts the final act of our rib-tastic symphony. It’s the moment of truth, where the magic of seasoning and the art of rib selection culminates in a concerto of crackling char and melt-in-your-mouth tenderness.
BBQ Ribs on Grill
But fear not, fellow rib-lovers, for broiling isn’t some mystical sorcery. It’s a dance of heat and timing, a delicate balance between crispy exterior and juicy interior. And I’m here to guide you through each step, ensuring your ribs erupt in a chorus of praise.
Prepping the Stage
Preheat Your Broiler: Crank that heat up to high, usually around 500°F. Give it time to preheat, ensuring those searing flames are ready to kiss your ribs.
Stage Your Ribs: Arrange your seasoned beauties on a foil-lined baking sheet, leaving space between them for even broiling. Remember, crowding leads to steaming, not the beautiful caramelisation we crave.
The First Act: Searing Perfection: Slide your baking sheet under the broiler, about 6 inches away from the heat source. Watch them sizzle, watch them smoke, watch the edges turn a golden brown – that’s the Maillard magic working its wonders. Broil for 5-7 minutes per side, adjusting for the thickness of your ribs.
The Basting Interlude
This is where the sweet and tangy melody comes in. Grab your chosen glaze, be it a classic BBQ sauce, a honey-mustard masterpiece, or your own secret concoction. Using a brush or spoon, baste each rib generously, letting the sauce coat them in a sticky embrace.
The Grand Finale: Crispy and Juicy Encore
Slide your glazed ribs back under the broiler for another 3-5 minutes per side. Keep a watchful eye, for the sugars in the glaze can burn quickly. You want a glistening, caramelised finish, not charcoal briquettes.
Rest and Revelation
Once they’re out of the fiery spotlight, let your ribs rest on a cutting board for 5-10 minutes. This allows the juices to be redistributed, creating an explosion of flavour with every bite.
The Encore: Dive In!
Now, the moment you’ve been waiting for. Grab your favourite sides, gather your rib-loving companions, and dig in! Let the crispy exterior crackle, let the juicy meat melt on your tongue, and let the symphony of spices and glaze play its final notes. You’ve created rib nirvana.
Bonus Tips
For extra-tender ribs, pre-cook them in the oven at 300°F for 1-2 hours before broiling.
Don’t overcrowd the pan! Give your ribs space to breathe and achieve even cooking.
To guarantee ideal doneness, use a meat thermometer. For succulent, fall-apart ribs, the internal temperature should be at least 145°F.
Get creative with your glazes! Experiment with different flavours and combinations to find your signature sauce.
Remember, broiling is a journey, not a destination. Embrace the sizzle, the smoke, the moments of “Did I just burn that?” and trust the process. You’ll be rewarded with ribs so good they’ll have your taste buds singing and your fingers sticky with pure culinary joy. So go forth, my fellow rib-lover, and broil with confidence! Let the symphony of flavours erupt in your kitchen, and share the rib-tastic love with the world (or at least your dinner companions).
Epilogue: The Broiled Rib Legacy
As the final notes of our broiled rib symphony fade, we’re left with a lingering melody of flavour, a testament to the culinary magic we’ve conjured. Our humble ribs, once mere mortals, have transcended into rib nirvana, their crispy exterior a testament to the fiery dance with the broiler, their juicy interior a symphony of spices and glaze.
But this journey wasn’t just about creating a culinary masterpiece; it was about embracing the art of cooking, about understanding the delicate balance between heat, time, and flavour. We delved into the world of rib selection, exploring the nuances of bone-in and boneless, back ribs and spare ribs, country-style and beyond.
We became maestros of seasoning, crafting rubs and marinades that infused our ribs with depth, complexity, and a hint of smoky barbecue mystique. We discovered the power of the broiler, that fiery conductor who coaxed forth the perfect blend of crispy char and juicy tenderness. And finally, we revelled in the sweet and tangy glaze, that sticky embrace that painted our ribs with an irresistible sheen, a promise of flavours to come.
So, as we savour the last morsel of our broiled rib masterpiece, let us remember that this culinary journey was more than just a recipe. It was an ode to the transformative power of cooking, a celebration of the flavours that bring us together, and a testament to the joy of creating something truly special.
Go forth, fellow rib-lovers, and spread the gospel of broiled rib nirvana. Share your newfound culinary prowess, inspire others to embrace the art of cooking, and create rib masterpieces that will linger in their memories long after the last bite.
Troubleshooting Broiled Country-Style Ribs
Although the process of broiling country-style ribs is fairly simple, there are a few possible problems that could occur. Here’s how to troubleshoot some common problems:
Problem: My ribs are dry and overcooked.
Solution:
Reduce the broiling time.
Make sure you’re not overcrowding the baking sheet. This can prevent the ribs from cooking evenly and lead to overcooking.
A meat thermometer ensures the ribs are cooked to the correct temperature. An internal temperature of 145°F is ideal for juicy, pull-apart ribs.
Problem: My ribs are not cooked through.
Solution:
Increase the broiling time.
Make sure the broiler is preheated to the correct temperature.
Arrange the ribs in a single layer on the baking sheet to ensure even cooking.
Problem: My ribs are burnt on the outside but not cooked through on the inside.
Solution:
Move the baking sheet further away from the broiler.
Reduce the broiling time.
Cover the ribs with foil during the last few minutes of broiling to prevent them from burning.
Problem: My ribs are not crispy on the outside.
Solution:
Baste the ribs with BBQ sauce during the last few minutes of broiling to help them crisp up.
Use a meat thermometer to ensure the ribs are cooked through before removing them from the broiler.
Problem: My ribs are not flavourful.
Solution:
Use a generous amount of seasoning.
Experiment with different spices and glazes to find your favourite flavour profile.
Marinate the ribs for at least 30 minutes before broiling to allow the flavours to penetrate the meat.
Here are some additional tips to help you troubleshoot any problems that arise:
Always use a meat thermometer to ensure the ribs are cooked to the correct temperature.
Use a foil-lined baking sheet for easy cleanup.
Let the ribs rest for 5-10 minutes after broiling to allow the juices to redistribute.
Get creative with your glazes! Experiment with different flavours and combinations to find your signature sauce.
Conclusion
With every bite of our broiled rib masterpiece, we’ve embarked on a culinary odyssey, a symphony of textures and flavours that has transformed mere ribs into rib nirvana. We’ve delved into the art of rib selection, unleashing the power of seasoning, and mastered the fiery dance with the broiler.
Our ribs, once humble contenders, now stand tall as culinary champions, their crispy exterior a testament to our broiling prowess, their juicy interior a testament to our seasoning symphony. We’ve discovered the magic of the sweet and tangy glaze, the sticky embrace that elevates our ribs to the realm of pure culinary bliss.
So, dear rib-lovers, go forth and spread the gospel of broiled rib nirvana. Share your newfound culinary wisdom, inspire others to embrace the art of cooking, and create rib masterpieces that will leave a lasting impression. Let the world rejoice in the symphony of flavours that broiled ribs bring, and let the legacy of rib nirvana live on!


 Salma Ihab