Ever dream of sinking your spoon into a decadent dessert, only to be stopped short by the dreaded “D” word: dairy? Don’t let lactose intolerance or vegan convictions steal your sweet tooth thunder!
Imagine fluffy, pillowy clouds of whipped cream gracing your coffee, hot chocolate, or pie—and guess what? They’re completely dairy-free! Here, we’ll whisk you away to a world of delicious possibilities with easy recipes for dairy-free whipped cream that are anything but bland.
From classic coconut cream to vegan options that ditch the coconut altogether, we’ll show you how to create dreamy toppings in minutes. Get ready to unleash your inner pastry chef because, with our tips and tricks, you’ll be a dairy-free whipped cream whiz in no time!
The Classic: Coconut Cream Dairy-Free Whipped Cream Recipe
dairy-free-whipped cream-recipe
The OG of the dairy-free world, This method is beloved for its simplicity and undeniable resemblance to the real deal. But before we dive into whipping up a storm, let’s understand the magic ingredient: full-fat canned coconut milk.
The key lies in the separation that occurs naturally in the can. We want the thick, creamy layer at the top. Here’s why: Unlike its lighter counterparts, full-fat coconut milk has a higher fat content, which is crucial for achieving that delightful whipped texture.
Now, let’s gather our ingredients and prepare to whip some dairy-free magic!
Ingredients
1 can (13.5 oz) full-fat canned coconut milk: Ensure it’s chilled for at least 8 hours, preferably overnight. Chilling is essential for successful whipping!
1/4 cup powdered sugar: This adds sweetness and helps stabilise the whipped cream. You can adjust the amount based on your taste preference.
1/2 teaspoon vanilla extract: Pure vanilla extract adds a touch of classic sweetness and beautifully complements the coconut flavour.
Electric mixer with whisk attachment: A trusty electric mixer will do the heavy lifting (or whisking) for you.
Step-by-Step Whipping
Chilling is Critical
The chilling process is the foundation of successful coconut whipped cream. The cold temperature helps solidify the fats in the coconut milk, making it easier to whip into fluffy peaks.
The science behind it is that as the temperature drops, the fat molecules clump together, creating air pockets when whipped. This gives our coconut cream that light and airy texture we crave. Aim for at least 8 hours of chilling or even overnight for guaranteed success.
The Perfect Whip
Now that your coconut milk is beautifully chilled unleash your inner whisk wizard (or grab your electric mixer)! Start by scooping out the solid cream from the top of the can, leaving the watery liquid behind.
We want to focus on the thick, creamy portion for optimal whipping. In a chilled bowl (remember, temperature matters!), begin whisking the coconut cream on medium speed. Gradually increase the speed to high as the cream thickens.
Watch in awe as it transforms from a smooth liquid to soft peaks. Patience is key here – don’t over-whip, or you’ll end up with a grainy mess.
Sweetness & Flavor Twists
Once your coconut cream reaches soft peaks, it’s time to add a touch of sweetness. Powdered sugar dissolves easily and is incorporated seamlessly into the whipped cream. Start with 1/3 cup and taste as you go, adding more for a sweeter result.
Remember, you can always add more, but can’t take it away! Feeling adventurous? A splash of vanilla extract adds a classic touch, but feel free to experiment with other flavourings like almond extract, cinnamon, or even a touch of cocoa powder for a chocolatey twist.
Beyond Coconut: Vegan Whipped Cream Options
While coconut cream whipped cream reigns supreme in the dairy-free world, it’s not the only option for vegan dessert lovers craving whipped cream!
Here, we’ll explore some fantastic alternatives that ditch the coconut altogether, proving that delicious dairy-free whipped cream comes in many forms.
Aquafaba Whipped Cream: The Magical Chickpea Brine
Ever heard of using chickpea brine to make whipped cream? Believe it or not, the liquid leftover from canned chickpeas and aquafaba can be whipped into a light, airy vegan dream! Here’s why it works:
The secret lies in aquafaba’s unique properties. It contains proteins and starches similar to those found in egg whites, so it can be whipped into a stable foam.
While aquafaba’s flavour can be slightly beany, the magic of whipping transforms it into a neutral base, ready to be flavoured to your heart’s content.
Creating Aquafaba Whipped Cream
Here’s what you’ll need to whip up some aquafaba magic:
1/2 cup aquafaba (chickpea brine): Reserve the liquid from a can of chickpeas.
1/4 cup powdered sugar: This sweetens the whipped cream and helps it hold its shape.
1/4 teaspoon cream of tartar: This acidic ingredient helps stabilise the aquafaba foam, leading to stiffer peaks.
1/2 teaspoon vanilla extract: Pure vanilla extract adds a touch of classic sweetness and complements the subtle flavour of aquafaba.
Electric mixer with whisk attachment: Your trusty mixer will whip the aquafaba into a cloud-like topping.
Step-by-Step Whipping
Prep and Whip: Drain the liquid from a can of chickpeas, reserving 1/2 cup of aquafaba. Strain the aquafaba through a cheesecloth to remove any chickpea residue. Whip the aquafaba with an electric mixer on medium speed in a chilled bowl. Gradually increase the speed to high and continue whipping for 5-7 minutes or until stiff peaks form. Here’s where the cream of tartar comes in: adding it halfway through whipping helps stabilise the foam and achieve those coveted stiff peaks.
Flavour Fiesta: Once your aquafaba has reached stiff peaks, it’s time to unleash your creativity! Gently fold in powdered sugar, vanilla extract, and any additional flavourings you desire. Be mindful of not over-mixing, as this can cause the whipped cream to lose its volume.
Soy Milk & Coconut Oil: A Creamy Collaboration
This option utilises the emulsifying power of coconut oil to create a stable vegan whipped cream. Soy milk provides the base, while the coconut oil helps it whip up light and fluffy.
The Science of Soy & Coconut
Ingredients for Success: Here’s what you’ll need:
½ cup chilled soy milk
2 tablespoons chilled coconut oil, melted but not hot
¼ cup powdered sugar
½ teaspoon vanilla extract
Whipping Up Vegan Delight:
Ensure all ingredients are cold! Chill the soy milk and coconut oil for at least 2 hours.
Combine chilled soy milk and melted coconut oil in a chilled bowl. Using an electric mixer on medium speed, start whipping. Gradually increase to high speed and continue whipping for 4-5 minutes or until stiff peaks form.
Slowly add powdered sugar and vanilla extract while whipping for another minute until fully incorporated.
Customisation and Flavor Variations
dairy-free whipped cream recipe
The beauty of dairy-free whipped cream lies in its incredible versatility. It’s a blank canvas just waiting for your creative touch!
Let’s explore some exciting ways to personalise your whipped cream and elevate your desserts to new heights.
Flavor Fiesta
Think beyond plain vanilla! Here are some ideas to tantalise your taste buds:
Cocoa Fantasy
For a chocolatey dream, sift in unsweetened cocoa powder while whipping. Start with a tablespoon and add more to taste. You can even fold in some dairy-free chocolate chips for an extra textural treat.
Spice Up Your Life
Feeling adventurous? A pinch of ground cinnamon, nutmeg, or cardamom adds a warm and inviting touch. Try a few drops of orange or lemon extract for a citrusy twist.
Fruity Fun
Love the taste of fresh fruit? Add puréed berries, chopped mango, or a drizzle of fruit syrup for a vibrant and refreshing twist.
Boozy Bliss (For Adults Only)
Craving a grown-up treat? Add a tablespoon of your favourite dairy-free liqueur (like Baileys or Amaretto) for a delightful and sophisticated twist (be sure to check the alcohol content for serving size).
Adding Textural Delights
Don’t stop at just flavour! Here are some ideas to add exciting textures to your whipped cream:
Nutty Crunch
Fold in chopped nuts like almonds, pecans, or walnuts for a delightful textural contrast. Toasted nuts add an extra layer of flavour.
Chocolate Chip Extravaganza
For a classic crowd-pleaser, fold in some dairy-free chocolate chips once the whipped cream has reached stiff peaks. You can use milk chocolate, dark chocolate, or even white chocolate chips to suit your taste.
Coconut Flake Fantasy
Looking for a tropical twist? Gently fold in some toasted coconut flakes for a delightful textural and visual contrast.
Serving Up Your Dairy-Free Whipped Cream Masterpiece
Now that you’ve mastered the art of whipping up delicious dairy-free whipped cream, it’s time to unleash your creativity and adorn your favourite desserts!
This versatile topping elevates various dishes, transforming them into decadent dairy-free delights.
Classic Companions: Hot Beverages and Beyond
Coffee and Hot Chocolate
Indulge in your morning cup of joe or a comforting mug of hot chocolate with a dollop of fluffy, dairy-free whipped cream. It adds a delightful sweetness and creamy texture, taking your hot beverage experience to a whole new level.
Tea Time Transformation
Elevate your afternoon tea ritual by adding a swirl of dairy-free whipped cream to your favourite cup of tea. Experiment with different flavours – a touch of cinnamon pairs beautifully with black tea, while a hint of vanilla complements herbal teas perfectly.
Dessert Delights: A Match Made in Dessert Heaven
Fruity Feasts
Top fresh fruit salads, pies, or crumbles with a dollop of dairy-free whipped cream. It adds a delightful creaminess that complements the fruit’s natural sweetness and tartness. For an extra fruity twist, consider folding in some puréed berries or a drizzle of fruit syrup into your whipped cream before serving.
Pancake and Waffle Extravaganza
Take your breakfast game to the next level by drizzling your favourite pancakes or waffles with warm maple syrup and crowning them with a generous dollop of dairy-free whipped cream. You can even add a sprinkle of chopped nuts or chocolate chips for an extra textural treat.
Ice Cream Sundae Sensations
Recreate the classic ice cream sundae experience with your favourite dairy-free ice cream, a drizzle of chocolate or caramel sauce, and a generous swirl of dairy-free whipped cream. Top it all off with a maraschino cherry for the ultimate nostalgic treat!
Baked Alaska, Anyone?
Feeling adventurous? Dairy-free whipped cream can even be used to create a stunning Baked Alaska! Simply layer a slice of dairy-free cake with your favourite dairy-free ice cream, encase it in a layer of frozen meringue, and then quickly brown the meringue with a kitchen torch. Top it all off with a dollop of dairy-free whipped cream for a truly impressive and delicious dessert.
Hot Puddings and Souffles
Add a dollop of whipped cream just before serving for a luxurious finish to a warm pudding or souffle. The contrasting temperatures create a delightful textural experience, and the whipped cream adds a touch of sweetness that perfectly complements the richness of the pudding or souffle.
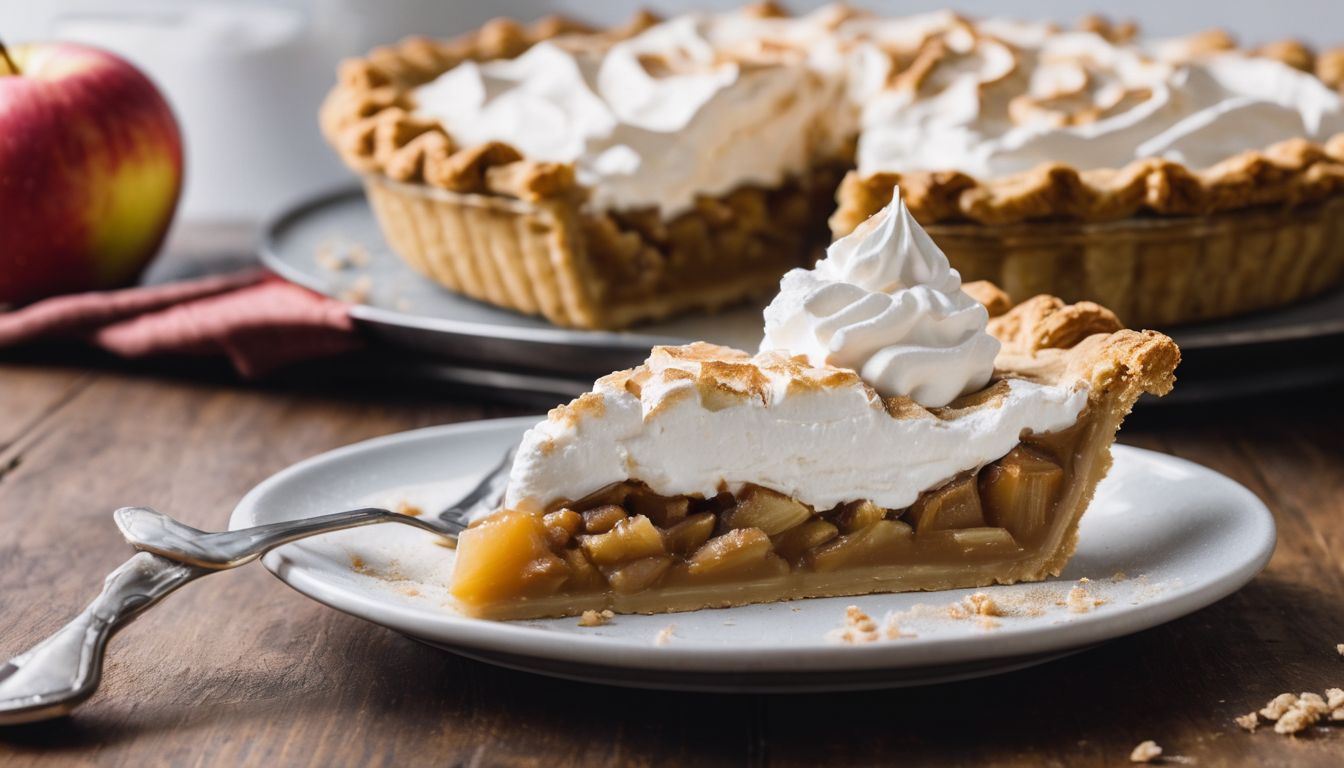
Pie Perfection
No pie is complete without a generous dollop of whipped cream! Top your favourite fruit pies, pumpkin pie, or even pecan pie with your homemade dairy-free whipped cream for a truly decadent and satisfying dessert.
httpss://youtu.be/DrSBhS_ulYA?si=tj_9XCx69aEi6gVu
Troubleshooting Tips: Whipping Up Success Every Time
Creating dairy-free whipped cream is a breeze, but even the best of us encounter occasional hiccups. Fear not, fellow dessert enthusiasts!
This section tackles common problems and offers solutions to ensure your whipped cream creations are consistently light, fluffy, and delightful.
Whipped Cream Woes: Not Thickening Up?
Temperature is Key
The most common culprit for whipped cream that refuses to thicken is temperature. Ensure all your ingredients are COLD. This includes the mixing bowl, whisk attachment, and the coconut milk (or other base) itself. Chilling everything for at least a few hours before whipping is crucial for success.
Whipping Woes
Did you whip for long enough? Whipping times can vary depending on the base you’re using. Aim for 2-3 minutes of whipping on high speed for coconut cream. For aquafaba, it can take 5-7 minutes. Keep an eye on your whipped cream and stop once it reaches stiff peaks.
Flavor and Sweetness Adjustments
Sweetness to Your Taste
Did your whipped cream turn out a little less sweet than you’d like? No problem! While the whipped cream is still on high speed, you can add more powdered sugar (or your chosen sweetener) a little at a time. Be sure to taste as you go to avoid over-sweetening.
Flavor Flubs
Maybe you went a little overboard with the flavourings. Unfortunately, there’s no easy fix for this. However, you can try adding a touch of plain whipped cream (made with a different base) to dilute the strong flavour.
Pro Tips for Perfect Whipped Cream
Fresh is Best
Use fresh ingredients whenever possible. Opt for full-fat canned coconut milk with a short ingredient list, and avoid using cans that have been sitting on the shelf for a long time.
Start Slow, Increase Gradually
When whipping your cream, begin on medium speed and gradually increase to high. This helps incorporate air bubbles without over-whipping.
Patience is a Virtue
Don’t get discouraged if your whipped cream doesn’t thicken up immediately. Keep whipping, and it will eventually reach stiff peaks (depending on the base you’re using).
Storing and Freezing Dairy-Free Whipped Cream
Storing and freezing dairy-free whipped cream depends on the base you used:
Refrigerating
Coconut Cream: Homemade dairy-free whipped cream made with chilled coconut cream can typically last up to a week in the refrigerator, stored in an airtight container in the back where it’s coldest.
Freezing (Not Recommended for Coconut Cream)
Coconut Cream: Unfortunately, coconut cream-based whipped cream doesn’t freeze well. Freezing disrupts the texture and can cause it to separate.
Freezing (For Other Dairy-Free Bases)
If your dairy-free whipped cream is made with a base that freezes well, like cashews or aquafaba (chickpea water), you can try freezing it.
Here’s a method:
Line a baking sheet with parchment paper.
Spoon dollops of whipped cream onto the baking sheet and freeze for a few hours or overnight.
Once frozen solid, transfer the dollops to a freezer-safe bag for individual portion storage [2].
Thaw for 5-7 minutes at room temperature before using.
General Tips
No matter the base, storing whipped cream in an airtight container is key to preventing spoilage and flavour absorption from other foods.
Consider making small batches of whipped cream to ensure freshness, especially if you plan to use it only after a few days.
Conclusion
Making dairy-free whipped cream is easier than you might think. With just a few simple ingredients and some basic steps, you can create a delicious and creamy topping that everyone can enjoy. Whether you choose coconut milk or another alternative, this recipe is sure to satisfy your cravings for whipped cream without dairy. So go ahead and give it a try—your taste buds will thank you!


 Asmaa Alhashimy
 Shaimaa Olwan