With this easy, gluten-free, and Dairy-Free Biscuit Recipe, you can enjoy the warm, comforting aroma of freshly baked biscuits filling your kitchen. You reach for one, that golden brown perfection begging to be devoured. Just know that with this recipe, gluten and dairy sensitivities mean those delicious biscuits are not off-limits anymore.
Disappointment washes over you. But wait! What if we told you there’s another way? A way to enjoy all that biscuit bliss without sacrificing taste or texture? This recipe unlocks the secret to unbelievably delicious gluten-free and dairy-free biscuits.
So ditch the disappointment and get ready to bake up a batch that’s so good that no one will guess they’re missing the usual suspects!
Can You Really Have Gluten-Free and Dairy-Free Biscuits?
Easy Gluten-Free and Dairy-Free Biscuits Recipe
The question lingers for many – can you truly achieve that classic biscuit texture, light and airy with a hint of flakiness, without the key ingredients: gluten and dairy? The answer is a resounding yes! The magic lies in understanding the role these ingredients play and finding clever substitutes.
Gluten, a protein found in wheat, barley, and rye, is responsible for the elasticity and structure of baked goods. In biscuits, it helps create layers and that satisfying rise. But fear not—gluten-free flours like almond or coconut flour can step in.
Almond flour, made from finely ground almonds, boasts a delightful nutty flavour and a natural binding ability, perfect for creating a biscuit-like crumb.
Coconut flour, while a great source of fibre, is very absorbent and can result in dry, dense biscuits if used alone. So, for the best results in our recipe, we’ll be focusing on almond flour as our hero ingredient.
On the dairy front, butter plays a crucial role in creating tenderness and richness in biscuits. But there are fantastic dairy-free alternatives that deliver similar results.
Unsweetened almond milk, for example, adds moisture and richness without dairy. Its subtle nutty flavour also beautifully complements the almond flour. While other dairy-free milk options like coconut milk or flax milk can work, their thicker consistency or stronger flavours might require slight adjustments to the recipe, something we’ll explore in a later section.
The Best Gluten-Free Flour
Choosing the right gluten-free flour is the foundation for achieving perfect gluten-free and dairy-free biscuits.
Here, we’ll explore some popular options and their impact on the final product:
Almond Flour
Our champion contender for this recipe is almond flour. This finely ground nut flour shines for several reasons. First, its texture is naturally light and airy, essential for creating fluffy biscuits. Second, almond flour possesses inherent binding properties due to the presence of almond meal. This binding ability helps the biscuits hold their shape without gluten, mimicking the structure traditionally provided by wheat flour.
While almond flour is a fantastic choice, it’s important to note that it absorbs more moisture than other flours. This means you might need to adjust the amount of liquid in your recipe to achieve the right consistency.
Additionally, some people may have nut allergies, so be sure to consider dietary needs when choosing your flour.
Coconut Flour
Coconut flour, another popular gluten-free option, boasts a unique nutritional profile, being high in fibre and low in carbs. However, it’s important to understand how coconut flour behaves differently from other flour.
Coconut flour is very absorbent, requiring significantly more liquid than other options. This can result in denser biscuits if not balanced correctly.
It’s recommended to use coconut flour in combination with other flours for a lighter texture in biscuits.
Oat Flour
Oat flour, made from grinding rolled oats, can be a good option for those seeking a slightly denser biscuit with a subtle oat flavour. However, a word of caution: Oats can sometimes be contaminated with gluten during processing.
If you have celiac disease or severe gluten sensitivity, it’s crucial to choose certified gluten-free oat flour to ensure safety.
Additionally, oat flour can be slightly denser than almond flour, so using a blend of both might be the best approach for achieving a balance of texture and flavour.
Selecting the Perfect Dairy-Free Milk
Just like the flour choice, selecting the right dairy-free milk plays a crucial role in the success of your gluten-free and dairy-free biscuits.
The key lies in finding milk that offers a good balance of moisture content and consistency to mimic the richness of traditional dairy milk.
Unsweetened Almond Milk
Unsweetened almond milk is a top contender for this recipe. This widely available dairy-free alternative offers several benefits. First, its consistency is similar to cow’s milk, making it a seamless substitute in baking.
Second, unsweetened almond milk keeps the sugar content of your biscuits in check, allowing the natural sweetness of other ingredients to shine through.
Additionally, almond milk is generally a good source of vitamins and minerals, making it a healthy choice for those with dietary restrictions.
However, it’s important to note that almond milk, like most dairy-free alternatives, lacks the fat content of cow’s milk. This can affect the richness and tenderness of baked goods.
To compensate, some recipes recommend adding a tablespoon of melted coconut oil or vegan butter for a touch of extra richness.
Coconut Milk
Coconut milk, particularly the full-fat variety, can be another option for those who enjoy a richer flavour profile. The thicker consistency of coconut milk can contribute to a denser biscuit, so it’s best used in combination with other dairy-free kinds of milk for a lighter texture.
Here’s a point to remember: Coconut milk has a distinct flavour that might not always complement biscuits. If you prefer a more neutral-tasting base, almond milk might be a better choice.
Flax Milk
Flax milk, made from ground flaxseeds, is a good source of omega-3 fatty acids and has a slightly nutty flavour.
However, like coconut milk, flax milk has a thicker consistency than cow’s milk and can lead to denser biscuits.
For optimal texture and flavour balance, it’s recommended to use flax milk sparingly or in combination with other dairy-free milk options.
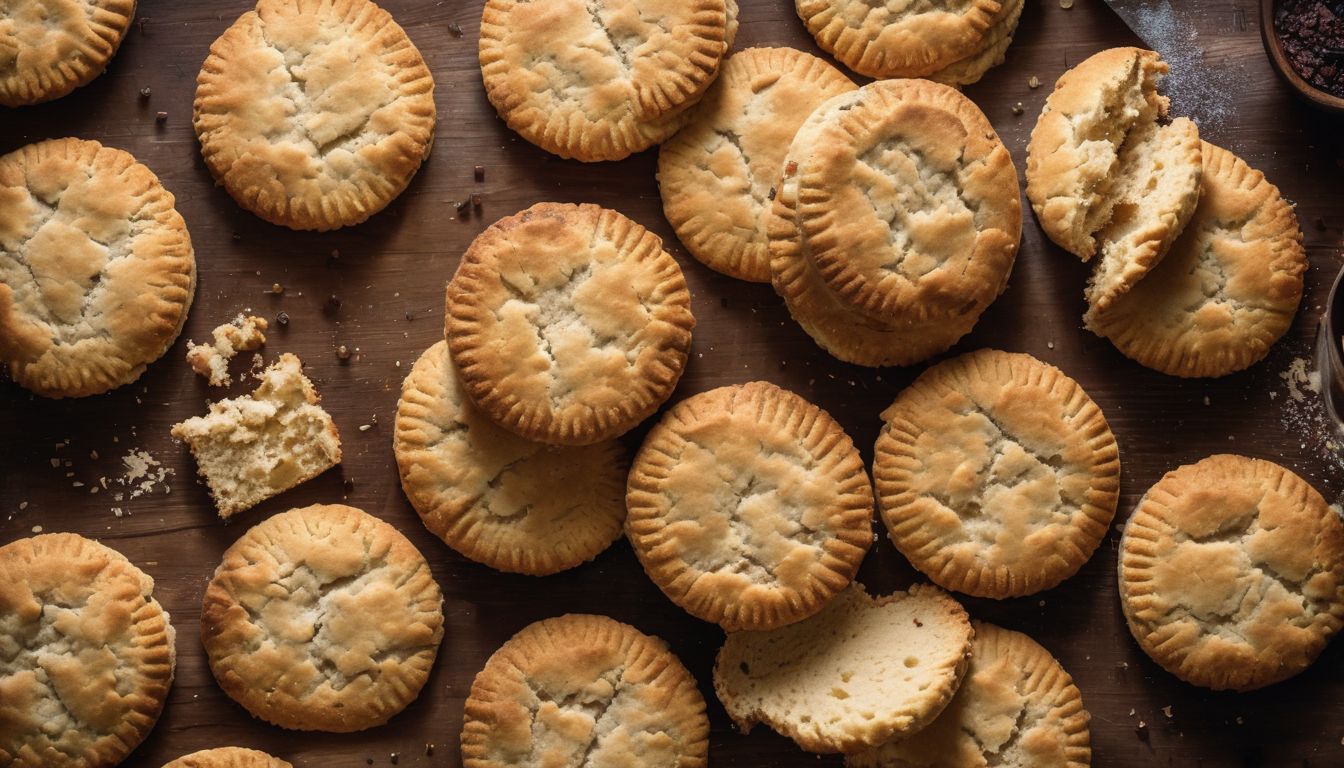
Easy Gluten-Free and Dairy-Free Biscuit Recipe
gluten-free and dairy-free biscuit recipe
Now that you’re armed with knowledge about the best gluten-free flours and dairy-free milks, let’s dive into the recipe itself!
This recipe is designed to be straightforward and achievable, even for novice bakers. With a few simple steps and readily available ingredients, you’ll enjoy warm, fluffy biscuits in no time.
Ingredients
1 1/2 cups almond flour
1/4 cup tapioca flour (or arrowroot flour)
1/4 cup unsweetened applesauce
1/4 cup melted dairy-free butter (or coconut oil)
1/2 cup unsweetened almond milk
1 large egg
1 tablespoon maple syrup (optional)
1 teaspoon baking powder
1/2 teaspoon baking soda
1/4 teaspoon salt
Instructions
Start by preheating your oven to 400°F (200°C) and line a baking sheet with parchment paper. This will ensure even baking and prevent sticking.
In a large mixing bowl, whisk together the almond flour, tapioca flour, baking powder, baking soda, and salt. This dry mixture forms the base of your biscuit structure.
In a separate bowl, combine the melted dairy-free butter (or coconut oil), unsweetened almond milk, egg, and maple syrup (if using). Using a whisk or fork, beat these wet ingredients until well combined and smooth.
Now comes the fun part – creating the biscuit dough! Gently pour the wet ingredients over the dry ingredients in the mixing bowl. Use a rubber spatula to fold everything together until just combined. Be careful not to overmix, as this can lead to tough biscuits. The dough should be slightly sticky but manageable.
Lightly flour a clean work surface and your hands. Gently pat the dough out to a thickness of about 1 inch. Use a round cookie cutter or a glass to cut out biscuit shapes. Place the biscuits on your prepared baking sheet, leaving space between them for even rising.
Pop your baking sheet into the preheated oven and bake for 12-15 minutes or until the biscuits are golden brown and cooked through. You can check for doneness by inserting a toothpick into the centre of a biscuit – it should come out clean.
Once baked, remove the biscuits from the oven and let them cool slightly on the baking sheet for a few minutes. Then, transfer them to a wire rack to cool completely. Now comes the best part – savour your delicious homemade gluten-free and dairy-free biscuits! Enjoy them warm with your favourite toppings or dips.
Tips for Flaky and Buttery Gluten-Free and Dairy-Free Biscuits
The quest for the perfect gluten-free and dairy-free biscuit doesn’t stop at the recipe. A few key techniques can elevate your biscuits from good to phenomenal, boasting that coveted flaky texture and rich buttery flavour.
Temperature Matters
Cold ingredients are essential for achieving flakiness in gluten-free and dairy-free biscuits. Here’s why: cold butter doesn’t readily incorporate into the dough, leaving small pockets of fat.
As the biscuits bake, these pockets melt, creating steam that separates the layers, resulting in a light and airy texture.
So, keep your dairy-free butter or coconut oil cold until ready to use, and consider chilling your almond milk for an extra edge of coldness.
Chilling the Dough
Similar to the concept of cold ingredients, chilling the dough allows the starches to hydrate and gluten-free flours to absorb moisture more evenly.
This resting period also helps firm up the fat, further contributing to flakiness. After mixing your dough:
Gently pat it into a disc shape.
Wrap it in plastic wrap.
Refrigerate for at least 30 minutes before shaping and baking.
Don’t Overmix
Overmixing is the enemy of tender, fluffy biscuits. When you mix the wet and dry ingredients, aim for just combined.
Overmixing develops the gluten in wheat flour, leading to a tough texture. In gluten-free baking, overmixing can activate xanthan gum or other binders, resulting in a denser biscuit.
Use a gentle folding motion with your spatula, stopping once there are no visible streaks of flour remaining.
Troubleshooting Common Issues
Even the most seasoned bakers encounter occasional mishaps. Here’s how to address a couple of common problems with gluten-free and dairy-free biscuits:
Dry Dough
If your dough feels too dry and crumbly after mixing, don’t despair! Start by adding a tablespoon of additional dairy-free milk, one tablespoon at a time, and mix gently until the dough comes together.
Remember, almond flour can be slightly more absorbent than other flours, so slight adjustments might be necessary.
Biscuits Aren’t Rising
This can happen for a few reasons. Ensure your baking powder and baking soda are fresh and active.
Double-check that you haven’t accidentally omitted them from the recipe. Additionally, make sure your oven is properly preheated to the correct temperature. A cool oven can hinder the rising process.
Flavour Variations for Your Gluten-Free and Dairy-Free Biscuits
The beauty of homemade biscuits lies in their versatility. Beyond the classic golden brown perfection, you can explore a world of flavour variations to suit your taste buds and dietary needs.
Here are some inspirational ideas to get your creative juices flowing:
Savory Sensations
Fresh Herbs: Elevate your biscuits with the delightful aroma and flavour of fresh herbs. Chopped chives, rosemary, or thyme can be folded into the dough before shaping.
You can even sprinkle a touch of these herbs on top of the biscuits before baking for an extra visual and flavour boost.
Spice It Up: Don’t be afraid to add a kick! A pinch of cayenne pepper or a sprinkle of smoked paprika can add a touch of warmth and complexity to your biscuits.
For a cheesy (dairy-free, of course) experience, consider adding a ¼ cup of your favourite vegan shredded cheese to the dough.
Sweet Treats
Fruity Delights: Fresh or dried fruit can be a delightful addition to your gluten-free and dairy-free biscuits. Chopped apples, blueberries, or cranberries can be gently folded into the dough for pops of sweetness and texture.
Alternatively, consider drizzling a simple glaze made with powdered sugar and a touch of dairy-free milk over the cooled biscuits for a touch of sweetness.
Chocolate Chip Cravings: Who can resist chocolate chips? Opt for dairy-free chocolate chips, readily available in most grocery stores these days, and fold them into the dough for a classic and satisfying treat. Consider using chopped dark chocolate or cacao nibs for a more sophisticated twist and a deeper chocolate flavour.
Beyond the Basics
Seeds for Texture: Adding a variety of seeds, such as chia, sunflower, or pumpkin seeds, can add a delightful crunch and a boost of nutrients to your biscuits.
Sugar on Top: For a classic sweet touch, brush the tops of your biscuits with a mixture of melted dairy-free butter or coconut oil and a sprinkle of granulated sugar before baking. This creates a beautiful caramelised crust.
Remember, these are just a starting point! Feel free to experiment with different combinations of herbs, spices, and fruits to create your own signature gluten-free and dairy-free biscuit masterpiece.
When choosing your ingredients, keep in mind any additional dietary restrictions. If incorporating very moist ingredients like fresh fruit, be sure to adjust the amount of liquid in the recipe slightly.
Serving Ideas for Your Delicious Gluten-Free Dairy-Free Biscuits
Your freshly baked gluten-free and dairy-free biscuits are out of the oven and ready to be enjoyed!
But how can you elevate them from simply delicious to a truly show-stopping culinary creation? Here are some inspiring serving ideas that showcase the versatility of these fantastic biscuits:
Breakfast Bliss
Classic Comfort: Warm your biscuits slightly and slather them with your favourite jam, nut butter, or dairy-free honey for a wholesome and satisfying breakfast.
Breakfast Sandwich Bonanza: Craft a breakfast sandwich masterpiece by layering scrambled eggs, cooked sausage or vegan breakfast sausage, and a slice of your favourite cheese (dairy-free alternative if needed) between two warm biscuits.
Savory Sensations
Biscuits and Gravy: This Southern classic can be enjoyed gluten-free and dairy-free! Whip up a batch of your favourite vegan sausage gravy and serve it smothered over your warm biscuits for a hearty and comforting meal.
Soup & Sides: Delectable gluten- and dairy-free biscuits perfectly accompany a variety of soups, stews, or chilis. Their soft texture provides a delightful contrast to spoonfuls of warm soup. Additionally, they can be used for dipping into creamy dairy-free dips and spreads.
Sweet Endings
Shortcake Sensation: For a delightful dessert, transform your biscuits into a gluten-free and dairy-free shortcake. Top them with fresh seasonal fruit, a dollop of dairy-free whipped cream, and a drizzle of maple syrup for a truly decadent treat.
Ice Cream Dreams: Warm biscuits can also serve as a delicious base for a gluten-free and dairy-free ice cream sundae. Top them with your favourite dairy-free ice cream, chopped nuts, and a drizzle of chocolate sauce for a homemade sundae experience.
Beyond the Meal
Snack Time Stars: These biscuits are perfect for satisfying afternoon cravings. Enjoy them plain, with a dollop of nut butter, or crumbled and sprinkled over yoghurt parfaits for added texture and flavour.
With a little creativity, the possibilities for enjoying your gluten-free and dairy-free biscuits are endless! So go forth, experiment, and savour the delicious versatility of these homemade treats.
Conclusion
These gluten-free and dairy-free biscuit recipes are perfect for those with dietary restrictions. With simple ingredients and easy steps, you can enjoy delicious biscuits that are fluffy and full of flavour.
Whether you prefer a vegan option or need to avoid certain ingredients, there’s a variation for everyone. So go ahead, give these biscuits a try and indulge in a tasty treat without worrying about gluten or dairy.
FAQs
How can I store leftover gluten-free and dairy-free biscuits?
You can store your cooled biscuits in an airtight container at room temperature for up to 2 days or freeze them for up to 3 months for longer storage.
Thaw frozen biscuits overnight in the refrigerator or reheat them gently in a preheated oven for a few minutes to refresh their texture.
Can I make these biscuits vegan?
Yes! Simply substitute the egg with a vegan egg replacer following the package instructions.
Many commercially available egg replacers are made from flaxseed meal or other plant-based ingredients and can effectively bind the dough.
Additionally, ensure you use a dairy-free milk and butter alternative suitable for vegans.
My biscuits turned out dry. What can I do?
There are a couple of reasons why your biscuits might be dry. First, ensure you measured the flour accurately. Too much flour can lead to a dry texture.
Second, different brands of almond flour can absorb moisture differently. If your dough feels dry after mixing, add a teaspoon of extra dairy-free milk until it reaches a soft and slightly sticky consistency.
How can I troubleshoot biscuits that aren’t rising?
A few factors can contribute to biscuits not rising properly. Double-check that your baking powder and baking soda are fresh and active.
Overmixing the dough can also hinder rising. Additionally, ensure your oven is fully preheated to the recommended temperature before baking.
How Do I Reheat Leftover Biscuits?
There are a couple of ways to reheat leftover gluten-free and dairy-free biscuits:
Microwave: Wrap a single biscuit in a damp paper towel and microwave on high for 10-15 seconds or until warmed through. Be careful not to overheat, as this can make the biscuits tough.
Oven: Preheat your oven to 350°F (175°C). Wrap the biscuits loosely in aluminium foil and place them on a baking sheet. Reheat for 5-10 minutes or until warmed through. This method helps retain moisture and ensures a slightly crispier exterior.


 Shaimaa Olwan
 Asmaa Alhashimy