Searching for an exquisite egg-free challah bread recipe can indeed be a bit of a quandary. It’s like embarking on a quest, isn’t it? Looking for that perfect medley of taste, texture, and healthiness is actually challenging. So, we’ve converted our humble kitchen into an experimental lab where I’ve delved deep into various ingredients.
Finally, we struck gold with this smashing egg-free challah recipe, which doesn’t scrimp on flavour or texture. Let’s embark on this riveting culinary journey together as we explore the delectable realm of vegan baking. Ready to get cracking?
Key Takeaways
Challah bread is a traditional Jewish bread usually made with eggs and honey, but a vegan version doesn’t use animal products.
To make egg-free challah, you can use aquafaba (liquid from canned chickpeas) or sugar as an egg substitute.
The recipe for vegan challah includes ingredients like flour, sugar, yeast, vegan butter or vegetable oil, and aquafaba.
Shaping the challah into braids adds beauty to the bread, and there are different techniques you can try. Practice makes perfect!
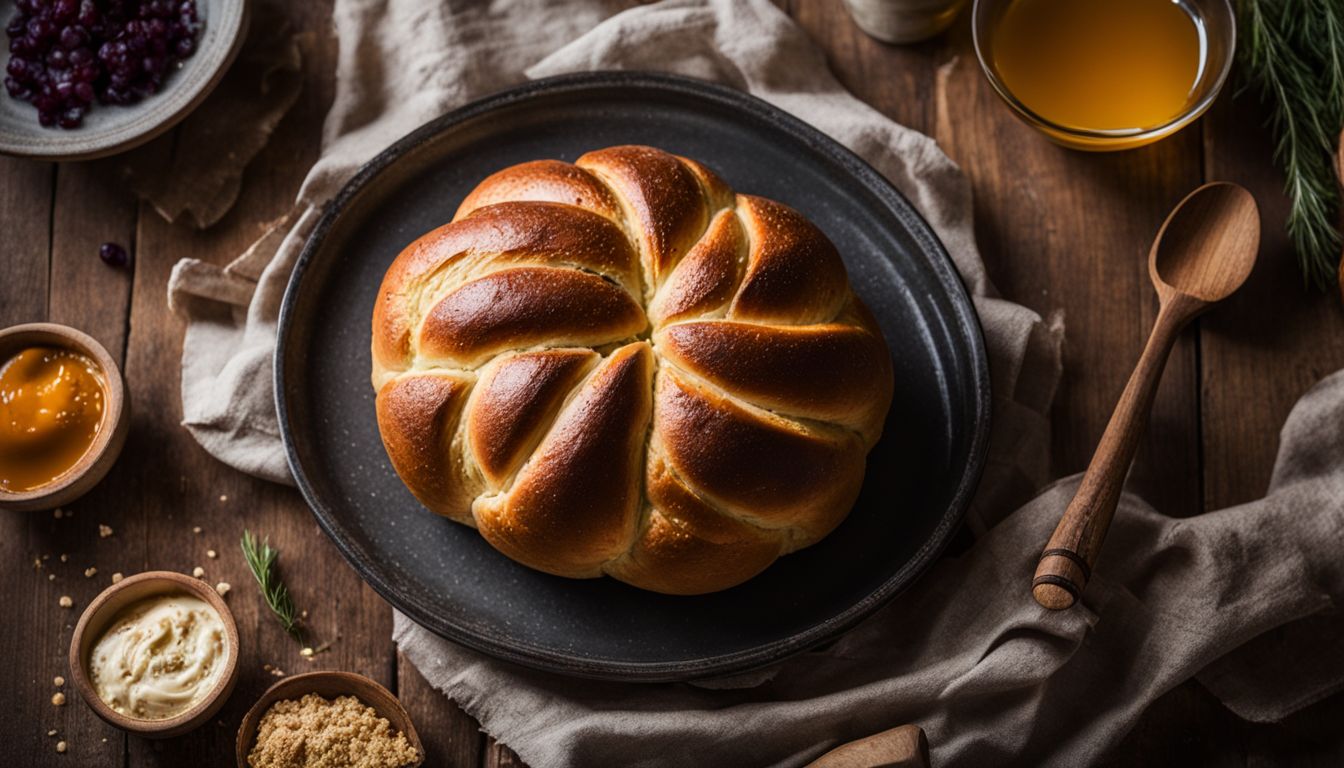
What is Challah Bread?
We love the soft, fluffy taste of challah bread. This traditional Jewish bread is usually made with eggs and honey. It is a big part of Jewish culture and rituals. But did you know there’s a vegan version too? You can enjoy this delicious treat even if you don’t eat eggs!
Making egg-free challah isn’t hard at all! All you need are the right ingredients and steps to follow. Some recipes use secret ingredients to make up for the lack of eggs. For instance, sweet potato purée adds richness to the dough and gives it a nice golden colour. After preparing your dough, shaping comes next! The beauty of Challah bread lies in its unique braids that might look complex at first, but with practice, these become easier to do.
httpss://www.youtube.com/watch?v=XIb0XEUMayo
The joy in baking doubles when our baked goods turn out great! In order to bake scrumptious egg-free challah, there are specific tips which one must keep an eye on, like maintaining temperature or avoiding common errors while mixing dough. Once your vegan challah is ready, serve it fresh from the oven. If any leftovers remain, which we doubt will be the case, store them properly, so they stay fresh as newly baked ones!
We believe everyone should enjoy good food regardless of dietary choices. Alternative food options like vegan bread or water bread bring variation to our meals without depriving us of flavourful delights. Challah bread is a traditional Jewish bread that is typically made with eggs and honey. It holds significant importance in Jewish culture and rituals.
httpss://www.youtube.com/watch?v=XIb0XEUMayo
Traditional Jewish Bread
Challah bread is a big part of Jewish cuisine. This special loaf comes from Ashkenazi Jews. It’s a traditional Jewish bread shared at Shabbat meals and on other important days. The braided shape isn’t just pretty; it holds deep meanings in the culture and celebrations.
The recipe for Challah does not use any milk or butter, so it fits well with many diets. But note that the classic way to make Challah is to use eggs. That’s why this bread often gets called egg or brioche-like bread.
Typically Made with Eggs and Honey
Challah bread is a sweet Jewish treat. This traditional bread gets its lovely taste from eggs and honey. These key parts give the Challah its soft feel and golden look.
Importance of Challah in Jewish Culture and Rituals
Challah bread is exceptional in Jewish life. It has a significant role during the Sabbath and other holidays. Jews have been making it since old times. Baking this bread brings an excellent blessing to the home. There are many stories and signs linked with challah.
Let’s talk about Challah bread. It usually has eggs and honey in it. People in the Jewish culture love this bread. But wait! What if you can’t eat eggs? We have good news! We can make an egg-free Challah. It is also known as egg-free Challah. You will be happy to know this bread looks and feels like the original one. It’s soft, fluffy, and tastes great!
We need some unique ingredients instead of eggs to make this egg-free Challah. These are aquafaba – which is like egg white made from chickpeas; sugar; and sweet potato puree – which gives our loaf a nice yellow colour. Making this eggless bread is manageable with our step-by-step guide! Just follow along, and you’ll have your own loaf soon enough.
You can use either all-purpose flour or bread flour for the dough. For those who struggle with braiding, don’t worry! We have tips on how to get a pretty shape for your challah. Baking should be fun, but there’s also a knack for getting it right every time, so I’ve got some advice here, too! Finally, once you’ve baked your beautiful loaf, enjoy it fresh out of the oven or store it well so you can savour its goodness later on.
httpss://www.youtube.com/watch?v=XIb0XEUMayo
Vegan Challah Bread Recipe
To make a vegan version of Challah bread, gather the following ingredients and follow these step-by-step instructions for a delicious egg-free loaf.
Egg-free Version of Challah
Challah bread is usually made with eggs. But you can make it without any eggs! This egg-free Challah has a soft feel and tastes excellent. You can use aquafaba, the liquid from canned chickpeas, instead of eggs.
Some people also use dairy-free yoghurt as a vegan egg replacement. Making this egg-free Challah is easy and fun! We love how vegan baking lets us enjoy traditional foods in new ways. Try out this recipe for your next meal or snack!
Ingredients and Measurements
For this egg-free challah recipe, we need some simple things. First of all, get 4 ½ cups of all-purpose flour ready. Then, take ¼ cup of plant-based sugar for a touch of sweetness. Don’t forget the active dry yeast – you will need one whole package, which is about the same as 2 ¼ teaspoons. To mix these in, choose vegan butter or vegetable oil! And here’s something exciting: we are using aquafaba instead of eggs.
What’s that? Just the liquid from canned chickpeas! It acts just like an egg in our bread recipe. So go ahead and open up those cans and keep the liquid safe for us to use later in our baking process.
Step-by-step Instructions for Making the Bread
To make the vegan or egg-free Challah Bread, start by combining 4 ½ cups of flour with vegan cane sugar and instant yeast in a mixing bowl. Mix well until all the dry ingredients are combined. Then, slowly add warm water to the mixture while stirring continuously. Keep adding water until a soft and sticky dough forms.
Next, transfer the dough onto a floured surface and knead it for about 10 minutes or until it becomes smooth and elastic. If the dough feels too sticky, sprinkle some extra flour as needed during kneading. After kneading, place the dough in a greased bowl and cover it with a clean kitchen towel. Allow it to rise in a warm spot for about an hour or until it doubles in size.
Once risen, punch down the dough gently to release any air bubbles that might have formed. Then, divide it into equal portions depending on how many strands you want for your braid. Roll each portion into long ropes of equal length. Now comes the time for shaping! You can use different braiding techniques, like three- or six-strand braids, to create beautiful patterns on your challah bread. Take care not to pull too tightly while shaping, as this can affect its texture once baked.
Once shaped, transfer your challah bread onto a baking sheet lined with parchment paper or a silicone mat. Cover them again with a kitchen towel and let them rise for another 30 minutes. As food lovers, we understand how important it is to find delicious alternatives for people with dietary restrictions or ethical reasons. That’s why we want to share with you a fantastic recipe for vegan challah bread.
Traditionally, challah is a Jewish bread made with eggs and honey. However, this egg-free version of challah is just as tasty and satisfying. Instead of eggs, we’ll use aquafaba, the liquid from canned chickpeas that is a great egg substitute. You’ll also need some sugar, flour, and yeast to make this excellent bread.
How to Make Vegan Challah
To make vegan or egg-free challah, start by combining the aquafaba with sugar in a large mixing bowl. Then add the flour and yeast while stirring continuously until you have a smooth dough. Knead the dough for about 10 minutes until it becomes elastic and springy. Let it rise in a warm place for an hour or until it doubles in size.
Now comes the fun part – shaping your challah! You can use various braiding techniques to create beautiful patterns on your loaf of bread. Take your time and experiment with different styles until you find one that suits your taste. Finally, bake the egg-free challah at around 375°F (190°C) for 30-40 minutes or until golden brown. The result will be a soft and fluffy bread that everyone will love!
Remember to serve your freshly baked egg-free challah warm or at room temperature alongside soups or salads for a complete meal experience. If there are any leftovers (which rarely happens), store them tightly wrapped in plastic wrap or an airtight container to keep them fresh for up to three days.
So why not give this egg-free challah recipe a try? You won’t be disappointed! Whether you follow dietary restrictions or want to explore new recipes, vegan challengers offer flavour and versatility without compromising on taste. Get ready to enjoy a delicious bread that everyone can savour!
How to Shape Challah Bread
Learn various braiding techniques to create beautiful shapes for your vegan challah bread. Achieve a stunning presentation that will impress everyone at the table. Read on to find out how!
Different Braiding Techniques
You can use several braiding techniques to shape your challah bread. You can make a three-strand, four-strand, or even six-strand braid. Each technique creates a unique and beautiful look for your bread.
If you’re new to braiding, tutorials and step-by-step instructions can help you learn the process. For a more advanced challenge, you can also try an eight-strand braid. Whichever technique you choose, remember that practice makes perfect!
Tips for Achieving a Beautiful Shape
To achieve a beautiful shape when shaping your challah bread, a few key tips can help. First, use high-gluten flour, which will give your dough better elasticity and structure.
It’s also important to measure your ingredients by weight rather than volume for more accuracy in your recipe. When proofing the dough, allow enough time to rise properly, as this will contribute to a desirable texture.
Brush the bread with an egg wash before baking for an attractive golden crust. Finally, experiment with different braiding techniques to create visually appealing shapes. By following these tips, you’ll be able to create stunning challah loaves every time!
Tips for Baking Egg-Free Challah
To achieve a soft and delicious texture in your egg-free challah bread, make sure to proof the yeast properly before adding it to the dough. Use warm water and a small amount of sugar to activate the yeast, allowing it to bubble and froth for about 10 minutes.
Now, let us take you through step-by-step instructions on how to make this egg-free challah. From mixing the ingredients to shaping the dough into beautiful braids – we’ve got all covered! Be sure to use bread or all-purpose flour when making your vegan challah bread.
When baking your vegan challah bread, keep an eye on achieving a golden brown crust and a soft interior. Baking time and temperature may vary depending on your oven’s specifications. Now enjoy your freshly baked loaf of vegan challah! There you have it – an egg-free option for those who love their challah but prefer not to use eggs or honey. With these tips and tricks in mind, you can create a scrumptious loaf of vegan challah that everyone will love.
Here is a list of vegan challah bread recipes that don’t use eggs or honey. One of the recipes is called “water challah” and doesn’t require eggs at all. Traditional challah bread usually includes ingredients like flour, water, sugar, yeast, oil, salt, eggs, and honey.
However, these vegan recipes use different ingredients to achieve a soft and fluffy texture. You’ll find step-by-step instructions for making the bread as well as tips on shaping it beautifully. We’ll also share some helpful advice on baking egg-free challah, so it has a delicious taste and stays nice and fresh when you store it.
How to Ensure the Bread Has a Soft Texture and Delicious Taste
To ensure that your egg-free challah bread has a soft texture and delicious taste, there are a few key things to keep in mind. First, using aquafaba, the liquid from canned chickpeas, as an egg substitute can help create that fluffy and tender texture you’re looking for.
Aquafaba acts as a binding agent and adds moisture to the dough, resulting in a light and airy bread. Additionally, when making vegan challah bread, it’s important to use sugar to recreate the sweetness of traditional challah without relying on eggs.
This will give your bread that irresistible flavour profile. Lastly, make sure to follow the instructions closely and allow enough time for the dough to rise correctly. This step is crucial in developing the softness of the final product.
Common Mistakes to Avoid
When baking egg-free challah, there are a few common mistakes to avoid. Firstly, be careful not to double brush the challah with egg wash, as this can make it heavy and dense. Secondly, don’t use too much flour when kneading the dough, as it can result in a dense and doughy texture.
Another mistake to steer clear of is allowing the braids to melt together during baking – make sure they’re well separated before placing them in the oven. Lastly, if you choose to freeze your challah dough for later use, remember to thaw it completely before baking. With these tips in mind, you’ll be able to bake delicious and fluffy egg-free challah every time!
Serving and Storing Vegan Challah
To serve vegan challah, slice the bread and enjoy it on its own or with your favourite spreads. It pairs well with jams, nut butter, or even avocados. To store the bread, wrap it tightly in plastic wrap or place it in an airtight container to maintain its freshness. It can be kept at room temperature for up to three days or frozen for future enjoyment.
Serving Suggestions
When it comes to serving vegan challah bread, there are plenty of delicious options. You can enjoy it as a standalone treat, slice and toast it for breakfast, or use it to make sandwiches. The soft and fluffy texture of the bread makes it perfect for dipping into soups or stews. You can also get creative with toppings by spreading vegan butter or jam on top or sprinkling some cinnamon sugar for an extra touch of sweetness.
Don’t forget to pair your challah bread with a hot cup of tea or coffee for a truly satisfying snack or meal. And when storing your vegan challah, make sure to keep it in an airtight container at room temperature to maintain its freshness for several days.
Proper Storage to Maintain Freshness
To keep your vegan challah bread fresh and delicious, it’s important to store it properly. After baking, let the bread cool completely on a wire rack. Once cooled, you can store the challah at room temperature for 3-4 days. To do this, wrap the bread tightly in plastic wrap or place it in a closed container. If your challah has a high oil content, it can last even longer without going stale.
If you have leftovers that need to be stored, make sure to transfer them to an airtight container. This will help maintain freshness and prevent any moisture from getting in. Refrigerating your vegan challah is also an option if you want it to last even longer – simply place it in an airtight bag or container and pop it in the fridge for up to four days.
Lastly, freezing is an excellent option if you’re not planning to eat all of your vegan challah immediately but still want to enjoy it later. You can freeze or slice the whole loaf before freezing – whichever works best for you! Just make sure to wrap each piece tightly with plastic wrap or foil before placing them in freezer bags or containers.
Conclusion
In conclusion, this egg-free challah recipe offers a beautiful option for those looking to enjoy traditional Jewish bread without eggs or honey. Its soft and fluffy texture makes it hard to tell the difference from the original recipe. Whether you’re vegan or simply want to try something new, give this easy and delicious bread a try!
FAQs
1. Can I make challah without eggs?
Yes, you can make egg-free challah by using substitutes such as applesauce, mashed bananas, or yoghurt to provide moisture and binding.
2. How long does it take to bake an egg-free challah?
The baking time for an egg-free challah is typically around 25-30 minutes at 350°F (180°C), but it may vary depending on your oven and the size of the bread.
3. What other ingredients are needed for an egg-free challah recipe?
As mentioned above, you will need a suitable substitute for eggs besides the usual ingredients like flour, yeast, water, sugar, and salt.
4. Does an egg-free challah taste different from a traditional one?
An egg-free challah may have a slightly different texture and taste compared to a traditional one because eggs contribute richness and structure to the bread. However, it can still be delicious and enjoyable.
5. Can I use any type of flour to make an egg-free challah?
Yes, you can use various types of flour, such as all-purpose flour or whole wheat flour, to make an egg-free challah. It depends on your preference and dietary needs.


 Asmaa Alhashimy
  Egg-Free Challah")