Craving that creamy, soul-warming rice pudding but following a vegan diet? Let’s discover a foolproof Instant Pot vegan rice pudding recipe! It’s a quicker, easier, and completely dairy-free version that delivers all the creamy goodness without the dairy.
So, ditch the limitations and get ready to create a guilt-free dessert that’s ready in minutes, thanks to your trusty Instant Pot. Learn how to achieve that creamy pudding but in a fraction of the time and with entirely plant-based ingredients.
Overview of Vegan Rice Pudding
Instant Pot vegan rice pudding is an innovative take on a beloved dessert that combines the rich, comforting flavours of rice pudding with the power of your favourite pressure cooker, the Instant Pot. But what exactly is it, and why should you ditch the stovetop for this modern method?
A Plant-Based Twist on a Classic
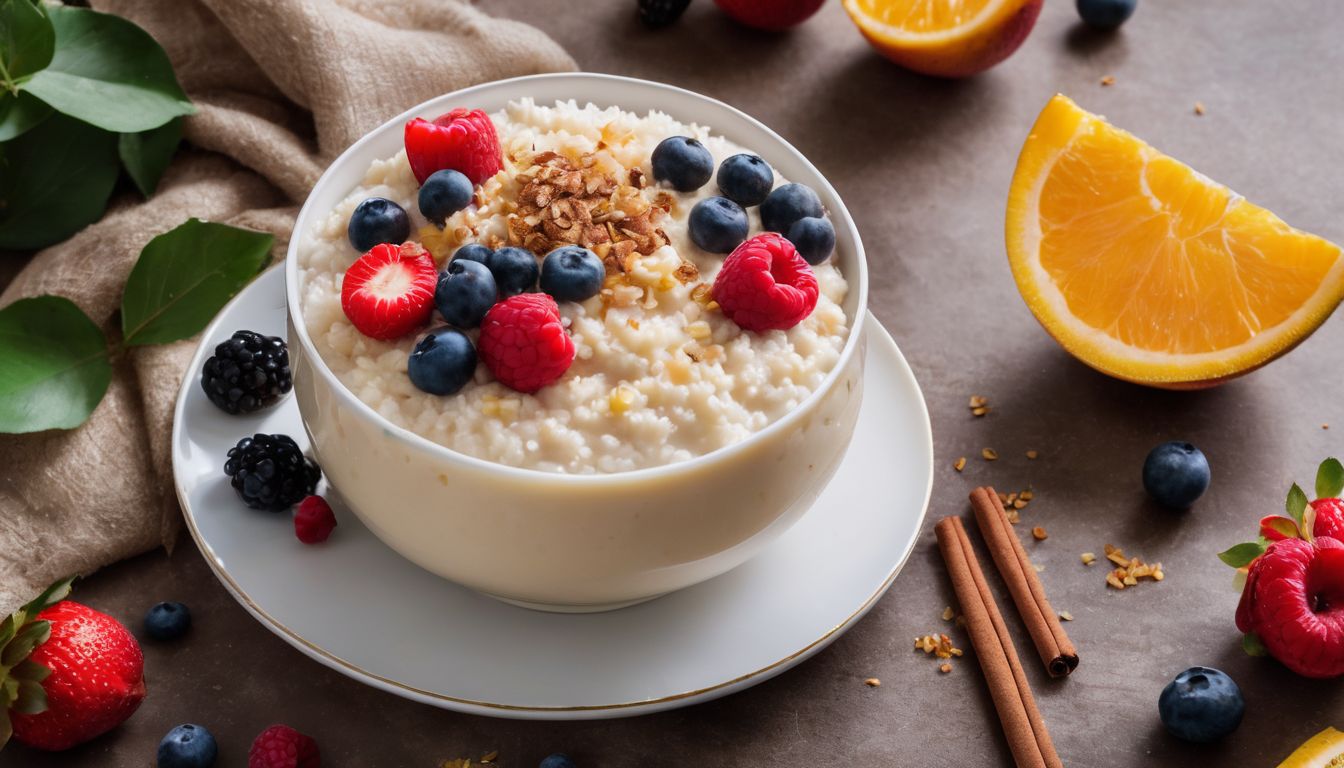
At its heart, Instant Pot vegan rice pudding is a delightful dessert made with rice cooked in plant-based milk, sweetened with natural alternatives, and infused with warming spices. Unlike traditional rice pudding that relies on dairy milk and eggs for its creaminess, the vegan version uses clever substitutions.
Plant-based milk alternatives like almond, coconut, or soy milk create a light and flavourful base, while natural sweeteners like maple syrup or coconut sugar add a touch of sweetness without compromising on dietary needs. This results in a pudding that’s just as creamy, comforting, and satisfying as the original but entirely vegan-friendly.
Benefits of Using Instant Pot to Make Vegan Rice Pudding
So why choose the Instant Pot for your vegan rice pudding? This handy kitchen appliance offers several advantages that make it a clear winner over traditional stovetop methods. Here’s why:
Speed and Convenience: Pressure cooking can significantly reduce cooking times. While stovetop rice pudding can simmer for upwards of an hour, the Instant Pot achieves that same creamy texture in a fraction of the time—typically around 15-20 minutes.
Hands-Off Cooking: Unlike stovetop rice pudding, which requires constant monitoring to prevent burning or sticking, the Instant Pot offers a truly hands-off experience. Simply combine your ingredients, set the timer, and let the pressure cooker work its magic. This frees you up to tackle other tasks while your delicious dessert practically cooks itself.
Perfect Texture Every Time: Achieving that ideal balance of creamy rice with a slight bite can be tricky on the stovetop. The Instant Pot, however, takes the guesswork out of the equation. The controlled pressure environment ensures perfectly cooked rice with a luxuriously creamy texture every single time.
Instant Pot Vegan Rice Pudding Recipe
httpss://youtu.be/OdtQX2HEDzU?si=LMeansfVjY2BshfH
Let’s get down to the delicious details! This Instant Pot vegan rice pudding recipe is a fantastic starting point, offering a base you can customise to your heart’s content.
Ingredients
¾ cup long-grain white rice (or any white rice you have on hand)
¾ cup water
2 cups unsweetened plant-based milk (such as almond, coconut, or soy milk)
¼ cup maple syrup (or another natural sweetener of your choice)
1 teaspoon ground cinnamon
½ teaspoon vanilla extract
¼ teaspoon salt
Instructions
Rinse your rice in a fine-mesh sieve to remove excess starch.
Add the rinsed rice, water, plant-based milk, maple syrup, cinnamon, and salt to your Instant Pot liner. Stir well to combine all ingredients.
Close the lid of your Instant Pot and ensure the pressure valve is set to “sealing.” Select the “Manual” or “Pressure Cook” function and set the timer for 15 minutes on high pressure.
Once the cooking time is complete, allow the pressure to release naturally for 10 minutes. This allows the rice to continue cooking gently and prevents a mushy texture. After 10 minutes, you can carefully release any remaining pressure manually.
Carefully open the lid of your Instant Pot and stir in the vanilla extract. The pudding will be quite loose at this stage, but don’t worry! It will thicken as it cools.
Spoon your Instant Pot vegan rice pudding into bowls and enjoy it warm or chilled. Top with your favourite chopped nuts, fresh fruit, a drizzle of plant-based milk, or a sprinkle of cinnamon for an extra flavour boost.
Tips to Achieve Perfect Instant Pot Vegan Rice Pudding
The beauty of Instant Pot vegan rice pudding lies in its simplicity. However, a few handy tips and techniques can elevate your vegan rice pudding and ensure creamy perfection every single time.
While rinsing rice is optional, it can help remove excess starch for a slightly less sticky pudding.
For an extra creamy texture, consider using soaked rice. Soaking the rice for 30 minutes before cooking allows the starches to release.
Choose your favourite plant-based milk, keeping in mind that coconut milk will add a richer flavour profile.
Vanilla extract is a classic addition to rice pudding, but feel free to explore other flavourings! Almond extract or orange zest can add exciting new dimensions to your dessert.
While it might be tempting to release the pressure manually right away, allowing for a natural pressure release is crucial. This step helps prevent the rice from becoming mushy and ensures a perfect texture.
The amount of maple syrup listed in the recipe is a starting point. Taste your pudding after pressure release and adjust the sweetness according to your preference.
If you prefer a slightly looser pudding, simply reduce the cooking time by a couple of minutes. For a thicker pudding, cook for an additional 2-3 minutes, allowing for a natural pressure release afterwards.
Proper Storage Method for Vegan Rice Pudding
The beauty of Instant Pot vegan rice pudding extends beyond its quick cooking time. It’s also a fantastic make-ahead dessert that translates perfectly to delicious leftovers. Here’s how to store and reheat your vegan rice pudding to ensure every bite remains just as creamy and delightful.
Storing at Room Temperature
Allow your freshly cooked Instant Pot vegan rice pudding to cool completely before storing. This helps prevent the growth of bacteria and ensures optimal texture. Transfer the cooled vegan rice pudding to an airtight container. This prevents air exposure, which can dry out the pudding or alter its flavour. Glass or BPA-free plastic containers work well.
Refrigerating for Short-Term Storage
Transfer your leftover pudding to an airtight container to prevent air exposure. Label your container with the date you made the pudding before placing it in the refrigerator. This helps you keep track of freshness and ensures you enjoy it at its peak. Properly stored in an airtight container, your Instant Pot vegan Rice Pudding will stay fresh and delicious in the refrigerator for up to 3 days.
Freezing for Long-Term Storage
While refrigeration is the preferred method for short-term storage, Instant Pot Vegan Rice Pudding can also be frozen for longer periods. Allow the pudding to cool completely, then portion it out into freezer-safe containers. Ensure the containers are airtight to prevent freezer burn. Frozen rice pudding will keep for up to 3 months. Thaw overnight in the refrigerator before enjoying.
Reheating Options and Instructions
When it’s time to enjoy your chilled vegan rice pudding, simply remove it from the refrigerator and allow it to thaw at room temperature for 20-30 minutes. Stir it well before serving.
You can reheat your rice pudding in the microwave. Place a portion in a microwave-safe bowl and heat on medium power for 30-60 seconds, stirring halfway through, until warmed to your desired temperature. Be careful not to overheat, as this can cause the pudding to become rubbery.
For a gentle reheat, transfer your desired portion of rice pudding to a saucepan over low heat. Add a splash of plant-based milk to prevent sticking, and constantly whisk until heated through.
Final Thoughts
Ultimately, making vegan rice pudding in an Instant Pot is an easy way to enjoy a creamy dessert without any dairy products. This innovative take on the classic rice pudding offers a creamy, comforting, and entirely dairy-free treat that’s ready in a fraction of the time compared to traditional methods.
For even more inspiration on delicious dairy-free creations, explore our website for wholesome dairy-free oatmeal recipes for a satisfying breakfast or learn how to whip up a festive dairy-free coquito to add a touch of vegan magic to your holidays.
Can I use brown rice in Instant Pot vegan rice pudding?
Yes, you can use brown rice in Instant Pot vegan rice pudding! However, since brown rice has a tougher texture and takes longer to cook than white rice, you’ll need to adjust the cooking time.
Is Instant Pot vegan rice pudding healthy?
The healthiness of Instant Pot vegan rice pudding depends on the ingredients you use. It is typically lower in fat than traditional rice pudding made with dairy milk and butter. You can also control the amount of added sugar by using natural sweeteners like maple syrup or dates. However, some plant-based milk alternatives can be high in sugar, so be sure to check the labels.
What are some fun toppings for Instant Pot vegan rice pudding?
The topping possibilities for Instant Pot vegan rice pudding are endless. You can top it with fresh fruits, chopped nuts, vegan chocolate chips, or a sprinkle of shredded vegan coconut.
What is the best plant-based milk to use in Instant Pot vegan rice pudding?
There’s no single “best” option! Choose based on flavour. For a neutral taste, use almond milk or soy milk. For a creamy pudding, use full-fat coconut milk. For sweet flavour, use unsweetened oat milk. Experiment to find your favourite!


 Salma Ihab