Egg roll wrappers, those thin and versatile sheets that bring a delightful crunch to your favourite appetisers, are not just a convenience from the store shelves; they can be a canvas for culinary creativity in your own kitchen. Egg roll wrappers typically contain wheat flour, water, and eggs. Sometimes, they may include salt and oil in the ingredients as well. The mix of these ingredients creates a thin, flexible dough ideal for wrapping and frying.
In this article, we launch on a journey of crafting homemade egg roll wrappers, exploring the simplicity of the process and the endless possibilities they offer. Whether you’re a seasoned home chef or a curious beginner, making your own egg roll wrappers allows you to tailor your taste, texture, and dietary preferences. Let’s tackle the art of crafting these delicate wraps and discover the joy of personalised, homemade goodness.
What Is the Origin of Egg Roll Wrapper?
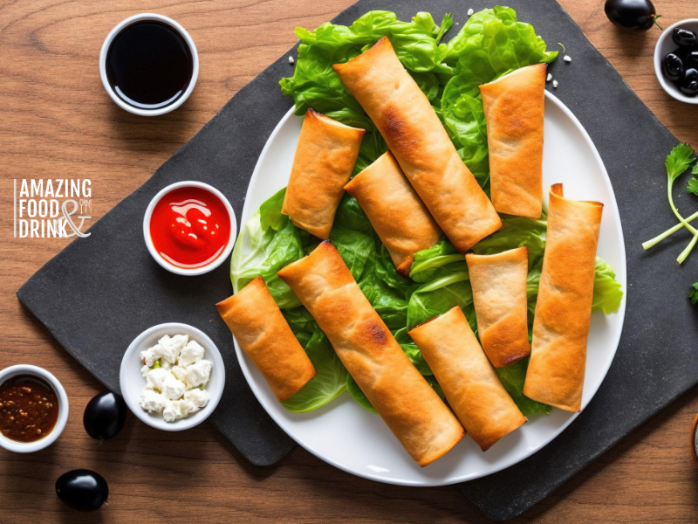
Egg Roll Wrapper
Egg roll wrappers have their origins in Chinese cuisine. They are a staple in Chinese-American cuisine, commonly used to make egg rolls, a popular deep-fried appetiser filled with a mixture of vegetables, meat, and sometimes other ingredients. The use of egg roll wrappers and the concept of wrapping fillings in a thin dough can be traced back to traditional Chinese cooking techniques.
It’s worth noting that the Chinese egg rolls are somewhat different from the spring rolls found in Southeast Asian cuisines, which often use rice paper wrappers. Adopting and adapting these culinary traditions in other parts of the world have led to variations in recipes and ingredients.
Why Is It Called Egg Roll?
The name refers to the cooking method rather than the ingredients. Egg rolls are typically filled with a mixture of vegetables, meat, and sometimes noodles and then rolled up in a wheat-flour-based wrapper. The “egg” in the name comes from the fact that the wrapper, when cooked, has a slightly yellowish colour, resembling the colour of an egg.
The dish is often deep-fried, and the name “egg roll” has been used to distinguish it from other types of rolls or spring rolls that might be wrapped in different types of wrappers or cooked using different methods. The name has become more associated with the American-Chinese version of the dish rather than its traditional Chinese counterparts.
Can Puff Pastry Be Used Instead of Egg Roll Wrappers?
Puff Pastry used instead of an egg roll wrapper
While puff pastry and egg roll wrappers serve different culinary purposes, you can use puff pastry as a substitute for egg roll wrappers in certain recipes. However, there will be differences in texture and taste.
Puff pastry is a flaky, buttery dough that puffs up when baked, creating a light and airy texture. On the other hand, egg roll wrappers are thin, doughy sheets often used for frying, resulting in a crispy texture. If you decide to use puff pastry instead of egg roll wrappers, consider the following:
Texture: Puff pastry will give a flakier and more buttery texture than egg roll wrappers’ traditional crispiness.
Cooking Method: Puff pastry is typically baked, not fried like egg roll wrappers. Adjusting the cooking method may be necessary based on the recipe.
Flavour: Puff pastry has a distinct buttery flavour, which may or may not complement the flavours of the filling in your recipe.
Size: Puff pastry sheets may need to be cut or rolled to fit the size required for your recipe.
Experiment and be open to the possibility of a different outcome than using traditional egg roll wrappers. If the recipe requires frying, you might miss the crispiness of egg roll wrappers. If baking is an option, puff pastry can be a creative twist on the dish.
What Do You Use to Seal Egg Rolls?
You can use egg wash; it is made by beating an egg with a small amount of water. Here’s a basic guide on how to use it:
Prepare the Egg Wash
Crack an egg into a bowl.
Add a small amount of water (usually a tablespoon or two).
Whisk the egg and water together until well combined.
Assemble the Egg Roll
Place a portion of the filling in the centre of the egg roll wrapper.
Sealing the Edges: You can dip a finger or a brush into the egg wash, then brush the egg wash along the edges of the wrapper.
Rolling and Sealing
Roll the egg roll, folding in the sides as you go, until it is tightly sealed.
The egg wash is like glue, helping seal the wrapper’s edges together.
Final Seal
Once you reach the end of the wrapper, apply a bit more egg wash to the final edge to ensure a secure seal.
The egg wash will dry and set during frying, creating a firm seal. This method is effective and helps give the outer layer of the egg roll a golden brown colour.
Suppose you prefer a vegetarian alternative or have an egg allergy. In that case, you can use a cornstarch slurry (cornstarch mixed with water) as a sealing agent. It won’t provide the same golden colour as an egg wash, but it still serves to seal the egg roll.
Making egg roll wrappers from scratch can be a fun and rewarding process. Here’s a basic recipe for homemade egg roll wrappers:
Ingredients
2 cups all-purpose flour
1/2 teaspoon salt
1/2 cup water
1 egg
Instructions
Mix Dry Ingredients: Combine the all-purpose flour and salt in a large bowl.
Create a Well: Make a well in the centre of the flour mixture.
Add Wet Ingredients: Crack the egg into the well and add water.
Combine: Gradually mix the wet ingredients into the flour, swirling with a fork until a dough forms.
Knead the Dough: Put the dough on a floured surface, knead it for about 5-7 minutes until it’s smooth and elastic, then wrap it in a cloth to rest for at least 30 minutes, making the dough easier to work with.
Roll Out the Dough: Divide the dough into smaller portions; roll each portion into a thin sheet on a floured surface. Aim for a thickness similar to store-bought egg roll wrappers.
Cut into Squares or Circles: Cut the rolled-out dough into squares or circles depending on your preference and desired shape.
Place your desired filling in the centre of each wrapper and fold it.
Making egg roll wrappers from scratch requires a bit of practice. You may need to slightly adjust the flour or water content to get the right consistency. Additionally, the size and thickness of the wrappers can be changed based on preferences. Homemade wrappers may have a different texture than store-bought ones. Still, the freshness and satisfaction of making them yourself can be worth it.
What Are the Best Fillers for Egg Roll Wrappers?
The best fillings for egg rolls can vary based on preferences, dietary restrictions, personal taste and culinary traditions. Here are some popular and delicious fillings that you can consider:
Vegetable Egg Rolls
Vegetable Egg Rolls
It contains some vegetables, such as:
Cabbage
Carrots
Bean sprouts
Bell peppers
Shiitake mushrooms
Bamboo shoots
Pork Egg Rolls
It contains many ingredients, such as:
Ground pork
Cabbage
Carrots
Green onions
Garlic
Ginger
Chicken Egg Rolls
It contains many ingredients, such as:
Shredded cooked chicken
Cabbage
Carrots
Celery
Water chestnuts
Soy sauce
Shrimp Egg Rolls
It contains many ingredients, such as:
Chopped cooked shrimp
Cabbage
Carrots
Bean sprouts
Garlic
Ginger
Vegetarian Egg Rolls
It contains many ingredients, such as:
Tofu or tempeh
Cabbage
Carrots
Bell peppers
Water chestnuts
Soy sauce or tamari
Sweet Potato Egg Rolls
httpss://www.youtube.com/watch?v=hzYzz-3rwXw
It contains many ingredients, such as:
Roasted sweet potatoes
Black beans
Corn
Red onion
Cumin
Chili powder
Thai-Inspired Egg Rolls
httpss://www.youtube.com/watch?v=H2rx5fM4llg
It contains many ingredients, such as:
Ground chicken or tofu
Thai basil
Mint
Cilantro
Bean sprouts
Thai chili sauce
Buffalo Chicken Egg Rolls
httpss://www.youtube.com/watch?v=7bL6l1Ctj3s
It contains many ingredients, such as:
Shredded cooked chicken
Cream cheese
Hot sauce
Celery
Blue cheese or ranch dressing for dipping
Season your fillings with soy sauce, ginger, garlic, and other spices to enhance the flavour. Experiment with different combinations to find the fillings that suit your taste preferences. Additionally, you can customise the dipping sauce to complement the flavours of your egg rolls.
What Is the Best Vegan, Dairy-Free Egg Roll Wrapper Recipe?
Here’s a simple recipe for vegan and dairy-free egg rolls:
Ingredients
2 cups all-purpose flour
1/2 teaspoon salt
1/2 cup warm water
2 cups shredded cabbage
1 cup shredded carrots
1 cup bean sprouts
1 cup sliced mushrooms
1 cup chopped tofu
3 green onions, chopped
2 cloves garlic, minced
1 tablespoon soy sauce
1 tablespoon sesame oil
1 tablespoon rice vinegar
1 teaspoon grated ginger
Salt and pepper to taste
Cornstarch mixed with water (for sealing)
Vegetable oil for frying
Instructions
Mix the flour with salt; gradually add warm water and knead until smooth dough forms.
Wrap the dough with a cloth to rest for 30 minutes or more.
Make small balls by dividing the dough and roll each into a thin wrapper on a floured surface.
Heat sesame oil in a large pan, add garlic and ginger, and sauté until fragrant.
Add tofu and cook until lightly browned.
Add mushrooms, cabbage, carrots, and bean sprouts. Cook until the vegetables are tender.
Stir in soy sauce, rice vinegar, green onions, salt, and pepper. Cook for an additional few minutes (2-3).
Set the filling aside from the heat and let it cool.
Place a spoonful of the cooled filling in the centre of each wrapper.
Mix cornstarch with water to make a slurry; brush the edges of the wrapper with the slurry and fold to seal.
Carefully place the sealed egg rolls in the hot vegetable oil and fry to golden brown.
Remove and drain on paper towels.
Serve the vegan egg rolls with your favourite dipping sauce, such as a soy sauce-based dip or sweet chilli sauce. Enjoy your delicious, dairy-free, and vegan-friendly egg rolls!
Crafting your own egg roll wrappers proves to be a rewarding experience. From the satisfying stretch of the dough to the aroma that fills your kitchen as they crisp up in the fryer, every step is a testament to the joy of homemade goodness. Experiment with various fillings, embrace different shapes and savour the delicious results. Whether you’re aiming for classic flavours or exploring innovative twists, the journey of making egg roll wrappers at home invites you to infuse your creations with a touch of your unique culinary identity. So, wrap it up, relish the process, and treat yourself to the delectable outcomes of your own kitchen endeavours.


 Asmaa Alhashimy
 Salma Ihab